Task 07 - Templates type model (Optional)
Estimated Time to Complete: ~10 minutes
In this task you'll use templates of type model to define reusable YAML-based configuration blocks that can be applied to multiple devices. Templates promote reuse, reduce duplication, and keep configuration consistent across the network.
What you'll learn
By the end of this task you will have:
- Written a reusable
model-type template (access_switch_vlans) that defines three VLANs - Referenced the template from the
ACCESS_SWITCHESdevice group - Verified the VLANs expanded onto both
access01andaccess02withshow vlan brief
Templates
Templates in Network as Code allow you to define configuration once and apply it to multiple devices by reference. Instead of repeating the same configuration in each device's YAML file, you define a template and simply reference it where needed. This works for any type of configuration - VLANs, interfaces, security policies, QoS settings, and more.
A template can be referenced at the individual device level, device group level, or even globally.
As described in the IOS XE Template documentation, templates provide:
- Reusability: Define configuration once, use it many times
- Consistency: Ensure identical configuration across devices
- Maintainability: Update template in one place, changes propagate everywhere
- Modularity: Keep configuration organized in separate, purpose-specific files
Template types:
| Type | Description | Use Case |
|---|---|---|
| model | YAML-based configuration template | Standard configurations (VLANs, ACLs, etc.) ← This chapter |
| file | External .tftpl template files |
Large configurations stored separately ← Task 08 |
| cli | Raw CLI commands | IOS XE features not supported in the IOS XE as Code data model ← Task 09 |
Which template type does this task cover?
Templates come in three flavors - model, file, and cli - and you'll meet all three across the next three tasks:
- This task (Task 07) introduces
modeltemplates: pure YAML against the data model, schema-validated, the right default for straightforward reuse. - Task 08 introduces
filetemplates (.tftpl), which add loops and conditionals on top of the same reference-by-name mechanic. - Task 09 introduces
clitemplates - the escape hatch for features not yet in the data model.
You'll see a side-by-side comparison of device_groups vs model vs file templates inside Task 08, and a final "which type should I pick?" decision tree at the end of Task 09 - once you've actually used all three.
Use case: standard VLANs for access switches
Access switches typically share the same VLAN configuration - they need identical VLANs for user traffic, voice, and management. Instead of defining VLANs separately for access01 and access02, you'll create a single template and apply it to both devices.
VLANs to configure:
- VLAN 10:
DATA- User data traffic - VLAN 20:
VOICE- VoIP traffic - VLAN 99:
MGMT- Management traffic
Why use Templates here?
Using a template for VLANs ensures that both access switches have identical VLAN configurations. If you need to add or modify VLANs in the future, you can do so in one place (the template) rather than updating each device's configuration individually.
You may wonder what's the difference between using a template versus a device group. The key distinction is that templates focus on what configuration to apply (the VLANs), while device groups focus on which devices receive that configuration (the access switches). In most cases, you can combine both approaches.
Step 1: Create the template file
First, create the file using your WSL Ubuntu terminal:
Then open data/templates/vlan.nac.yaml in VS Code and add the following content. This file defines a reusable VLAN template:
---
iosxe:
  templates:
    - name: access_switch_vlans
      type: model
      configuration:
        vlan:
          vlans:
            - id: 10
              name: DATA
            - id: 20
              name: VOICE
            - id: 99
              name: MGMT
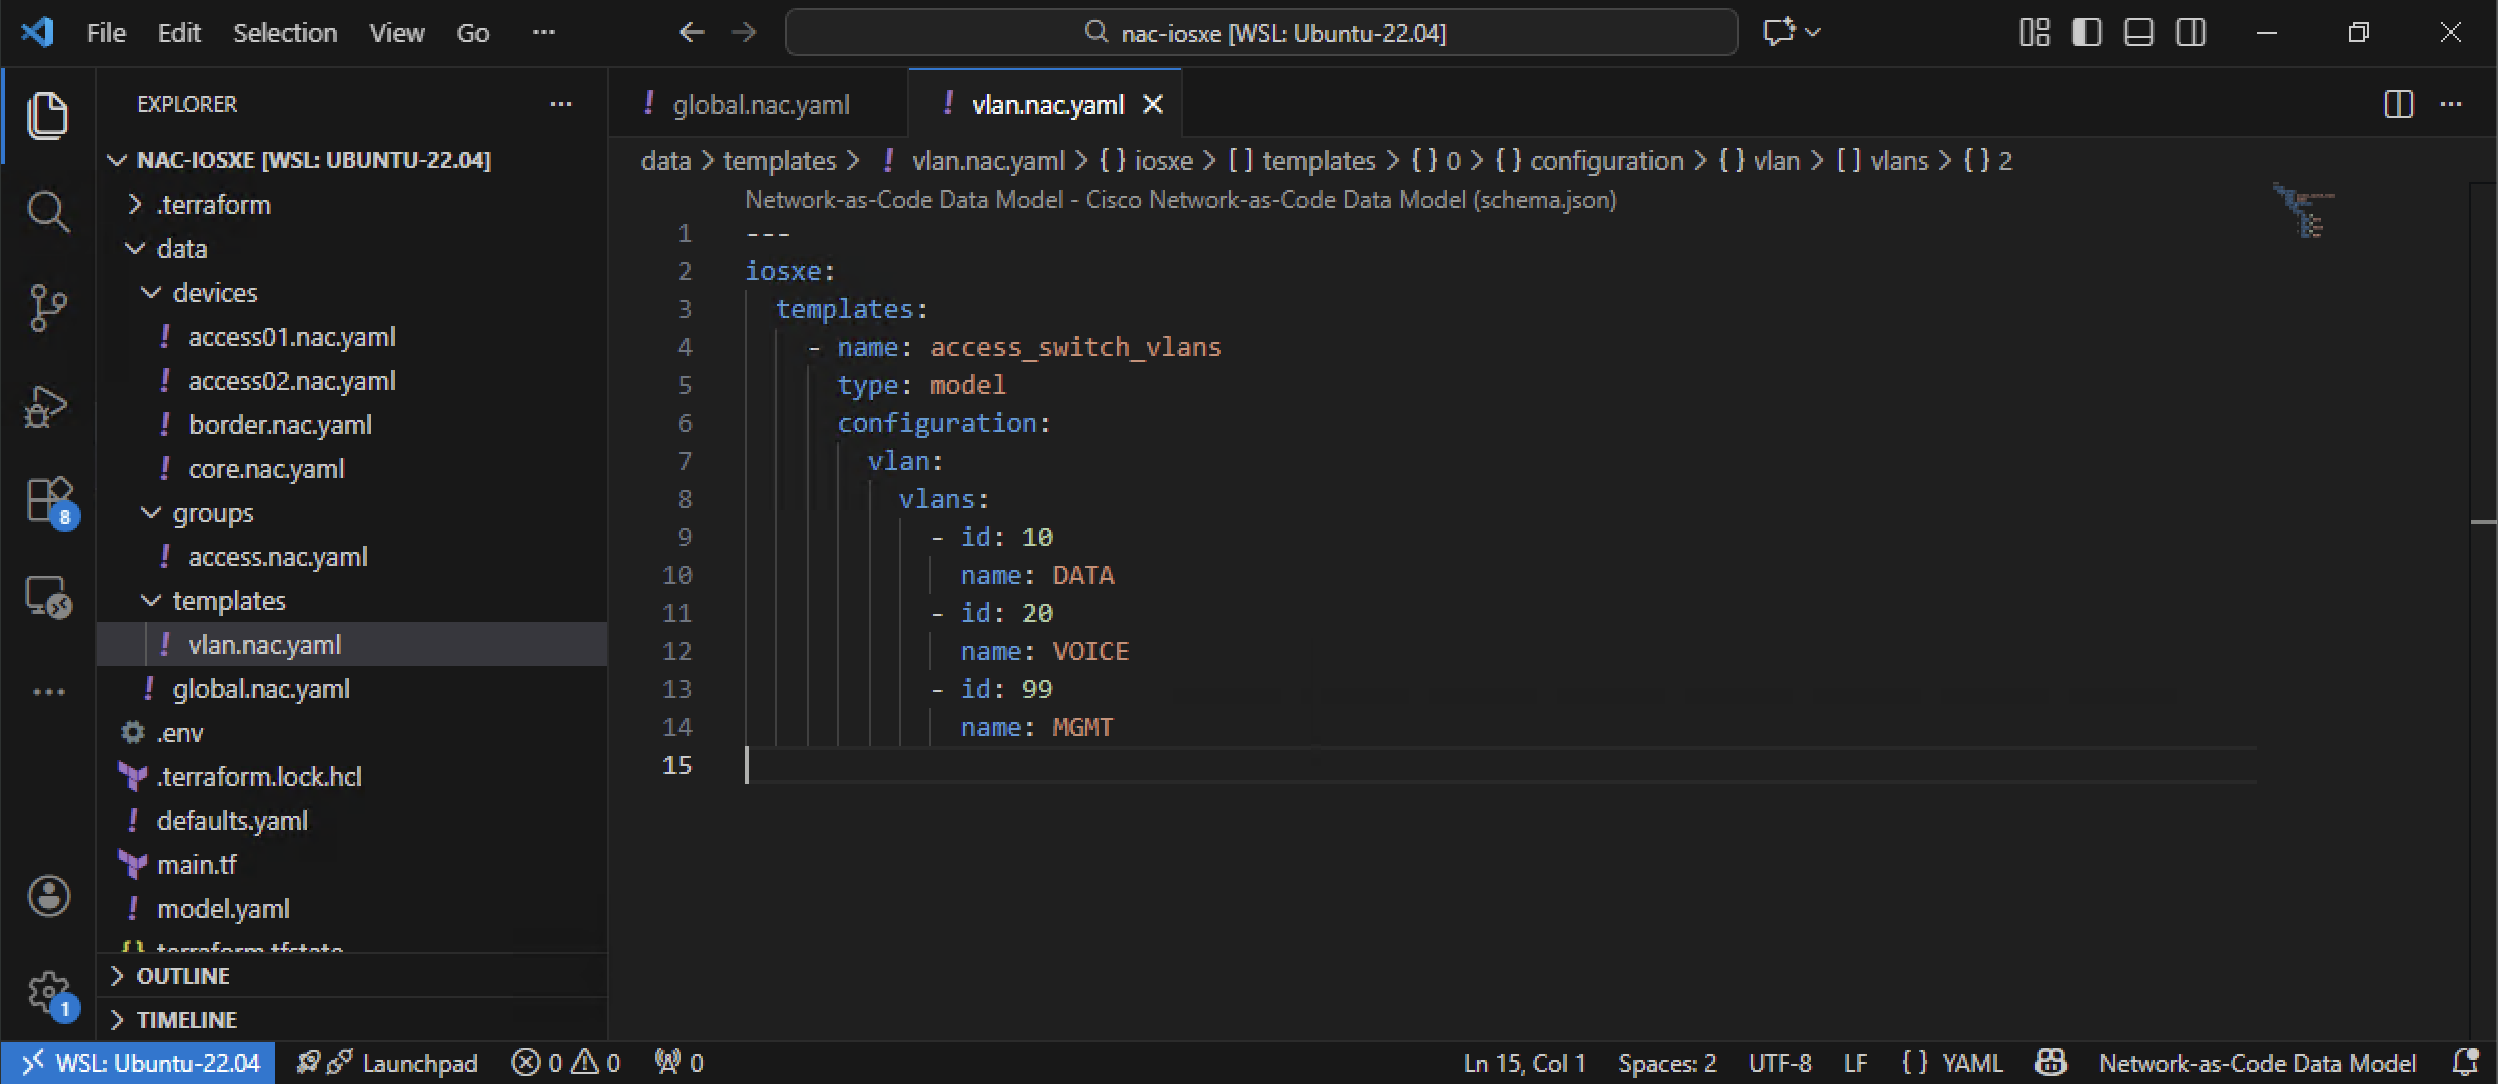
Configuration breakdown
Let's break down the key elements:
Template Definition:
templates:- List of template definitions at the top levelname: access_switch_vlans- Unique identifier for this templatetype: model- Indicates this is a YAML-based configuration templateconfiguration:- Contains the actual configuration to be applied
VLAN Configuration:
vlan:- VLAN configuration sectionvlans:- List of individual VLAN definitionsid:- VLAN ID number (1-4094)name:- Descriptive name for the VLAN
Step 2: Apply template to access switches
Now you need to apply the template to the access switches. Open the existing data/groups/access.nac.yaml file in VS Code (this file was created in Task04) and add the templates: section, at the end of the YAML configuration file:
---
iosxe:
  device_groups:
    - name: ACCESS_SWITCHES
      devices:
        - access01
        - access02
      configuration:
        access_lists:
          standard:
            - name: AccessLayerACL
              entries:
                - sequence: 10
                  action: permit
                  prefix: 10.0.0.0
                  prefix_mask: 0.0.0.255
                - sequence: 20
                  action: permit
                  prefix: 20.0.0.0
                  prefix_mask: 0.0.0.255
      templates:
        - access_switch_vlans
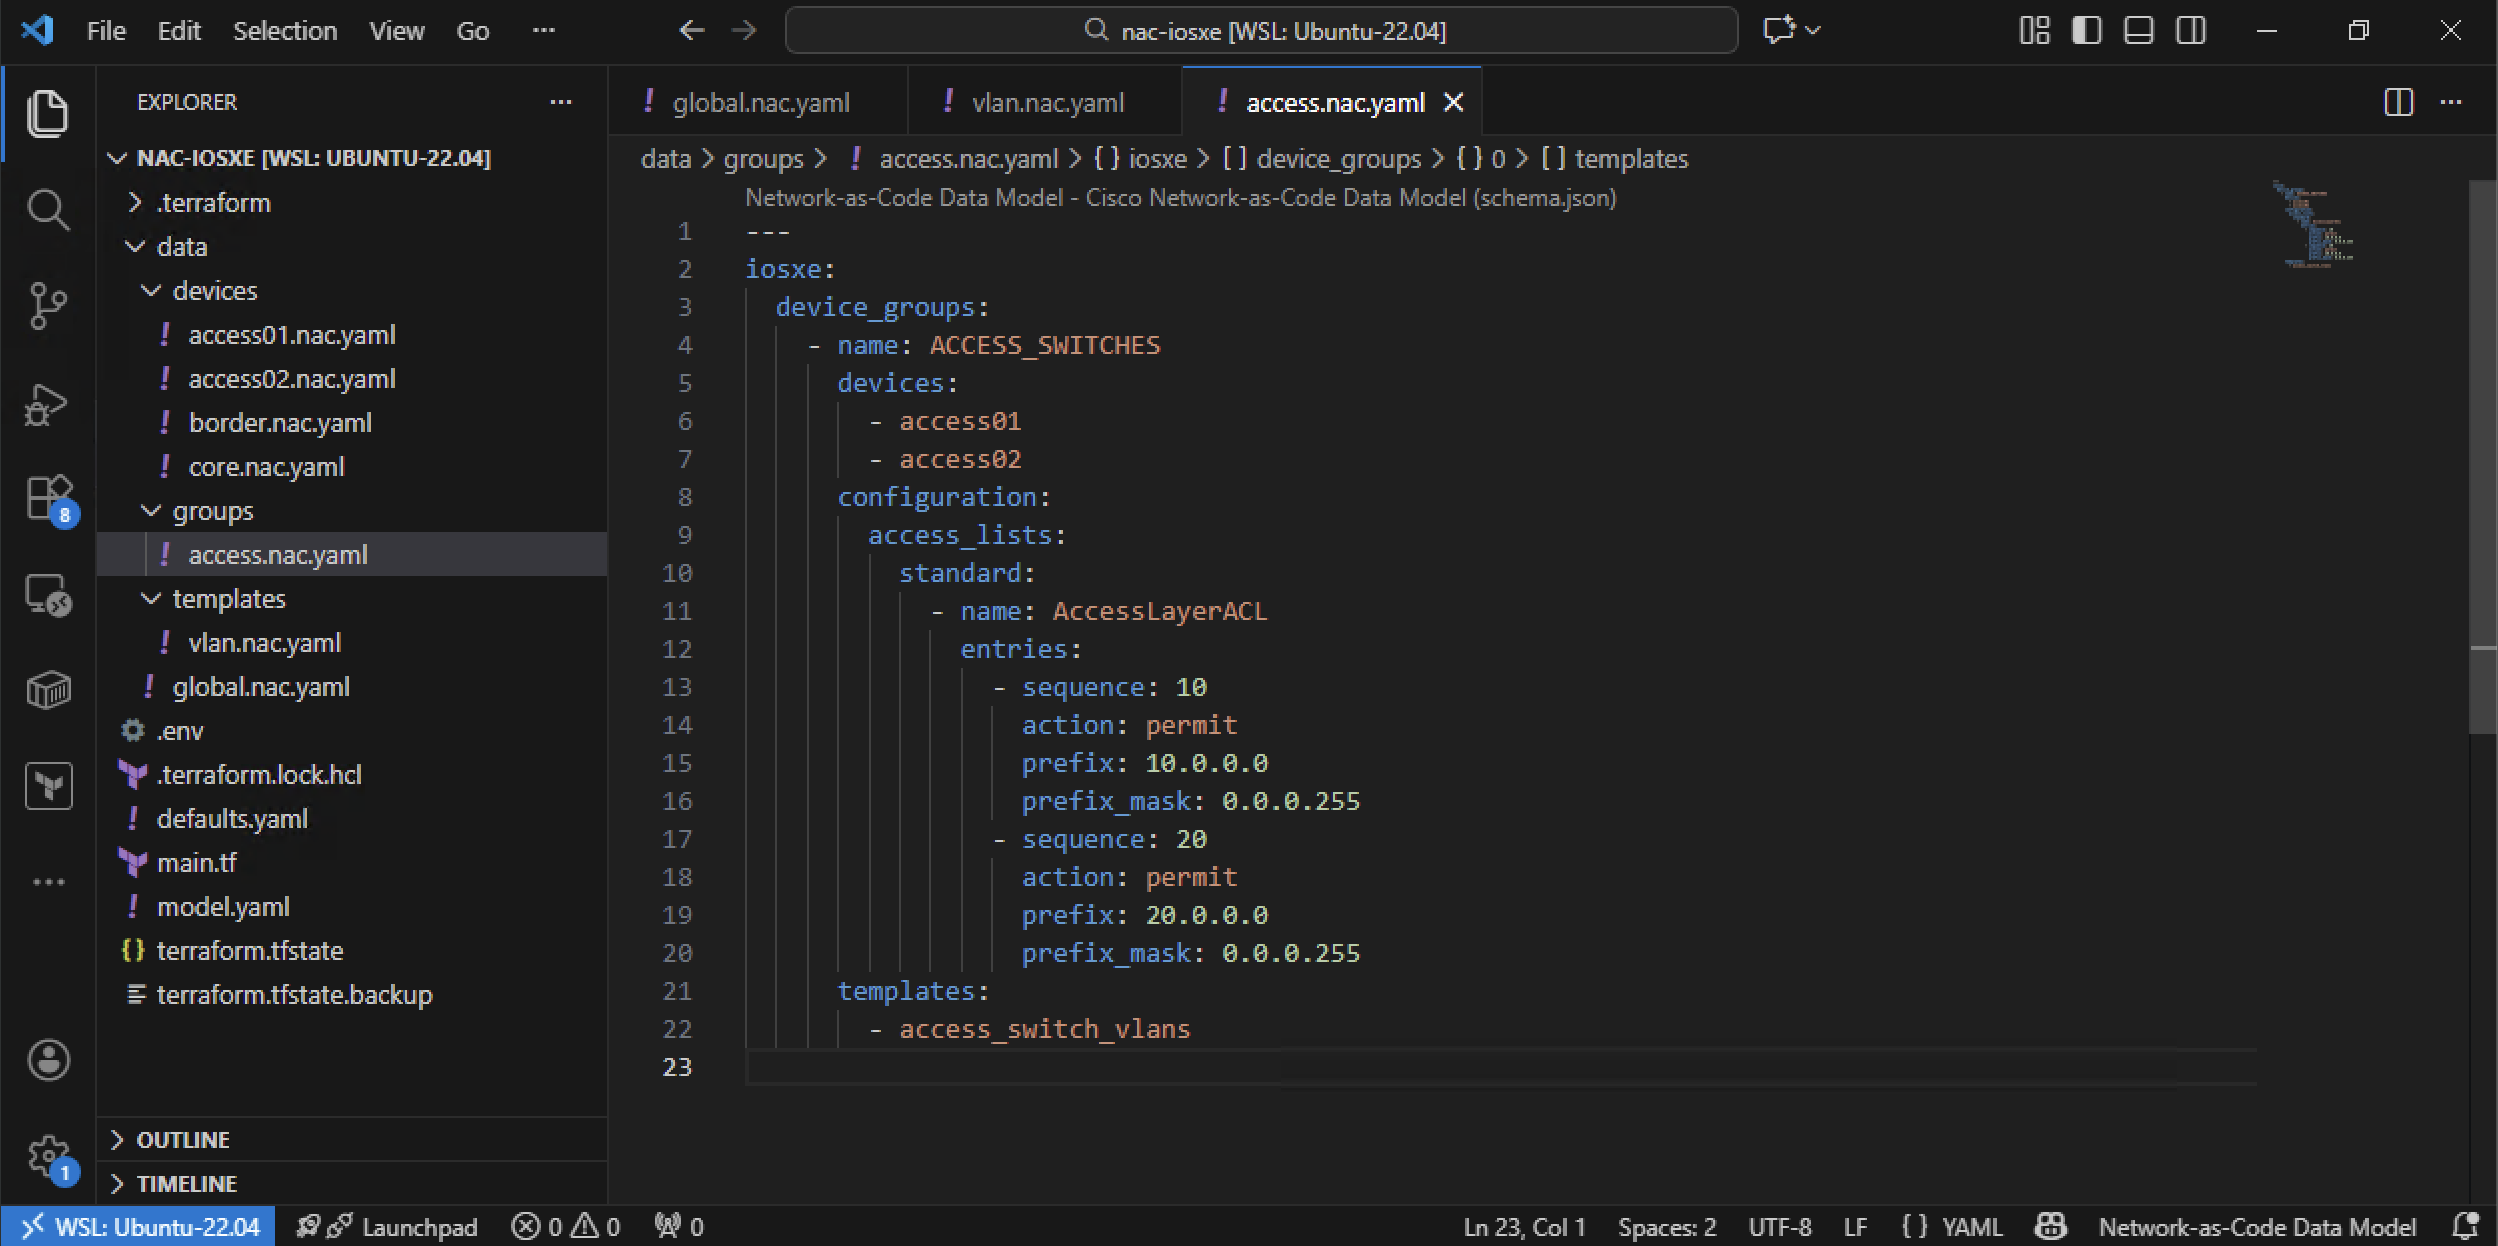
What was added
templates:- New section to apply templates to all switches in theACCESS_SWITCHESdevice groupaccess_switch_vlans: Reference to the VLAN template defined intemplates/vlan.nac.yaml
The template reference is added alongside the existing AccessLayerACL configuration. After running terraform apply, both the ACL and VLAN configuration will be present on access01 and access02.
Verify project structure
At this point, your data/ folder should contain these files:
/home/cisco/nac-iosxe/
├── .env
├── main.tf
└── data/
    ├── devices/
    │   ├── access01.nac.yaml   # Task02: access01 registration
    │   ├── access02.nac.yaml   # Task02: access02 registration
    │   ├── border.nac.yaml     # Task02: border registration
    │   └── core.nac.yaml       # Task02 + Task05: core + Loopback0
    ├── groups/
    │   └── access.nac.yaml     # Task04 + Task07: ACL + VLAN template
    ├── templates/
    │   └── vlan.nac.yaml       # Task07: VLAN template (type: model)
    └── global.nac.yaml         # Task03: Global banner + hostname
How templates work
When Network as Code processes your configuration:
- Template Resolution: NaC reads the
templates/vlan.nac.yamlfile and loads theaccess_switch_vlanstemplate, defined underiosxe: templates - Device Group Processing: NaC reads
groups/access.nac.yamland finds theaccess_switch_vlanstemplate applied to theACCESS_SWITCHESgroup - Configuration Merge: For access01 and access02 (members of the
ACCESS_SWITCHESgroup), the template's configuration is merged with their settings - Deployment: VLANs are created on both access01 and access02 (but not on core or border)
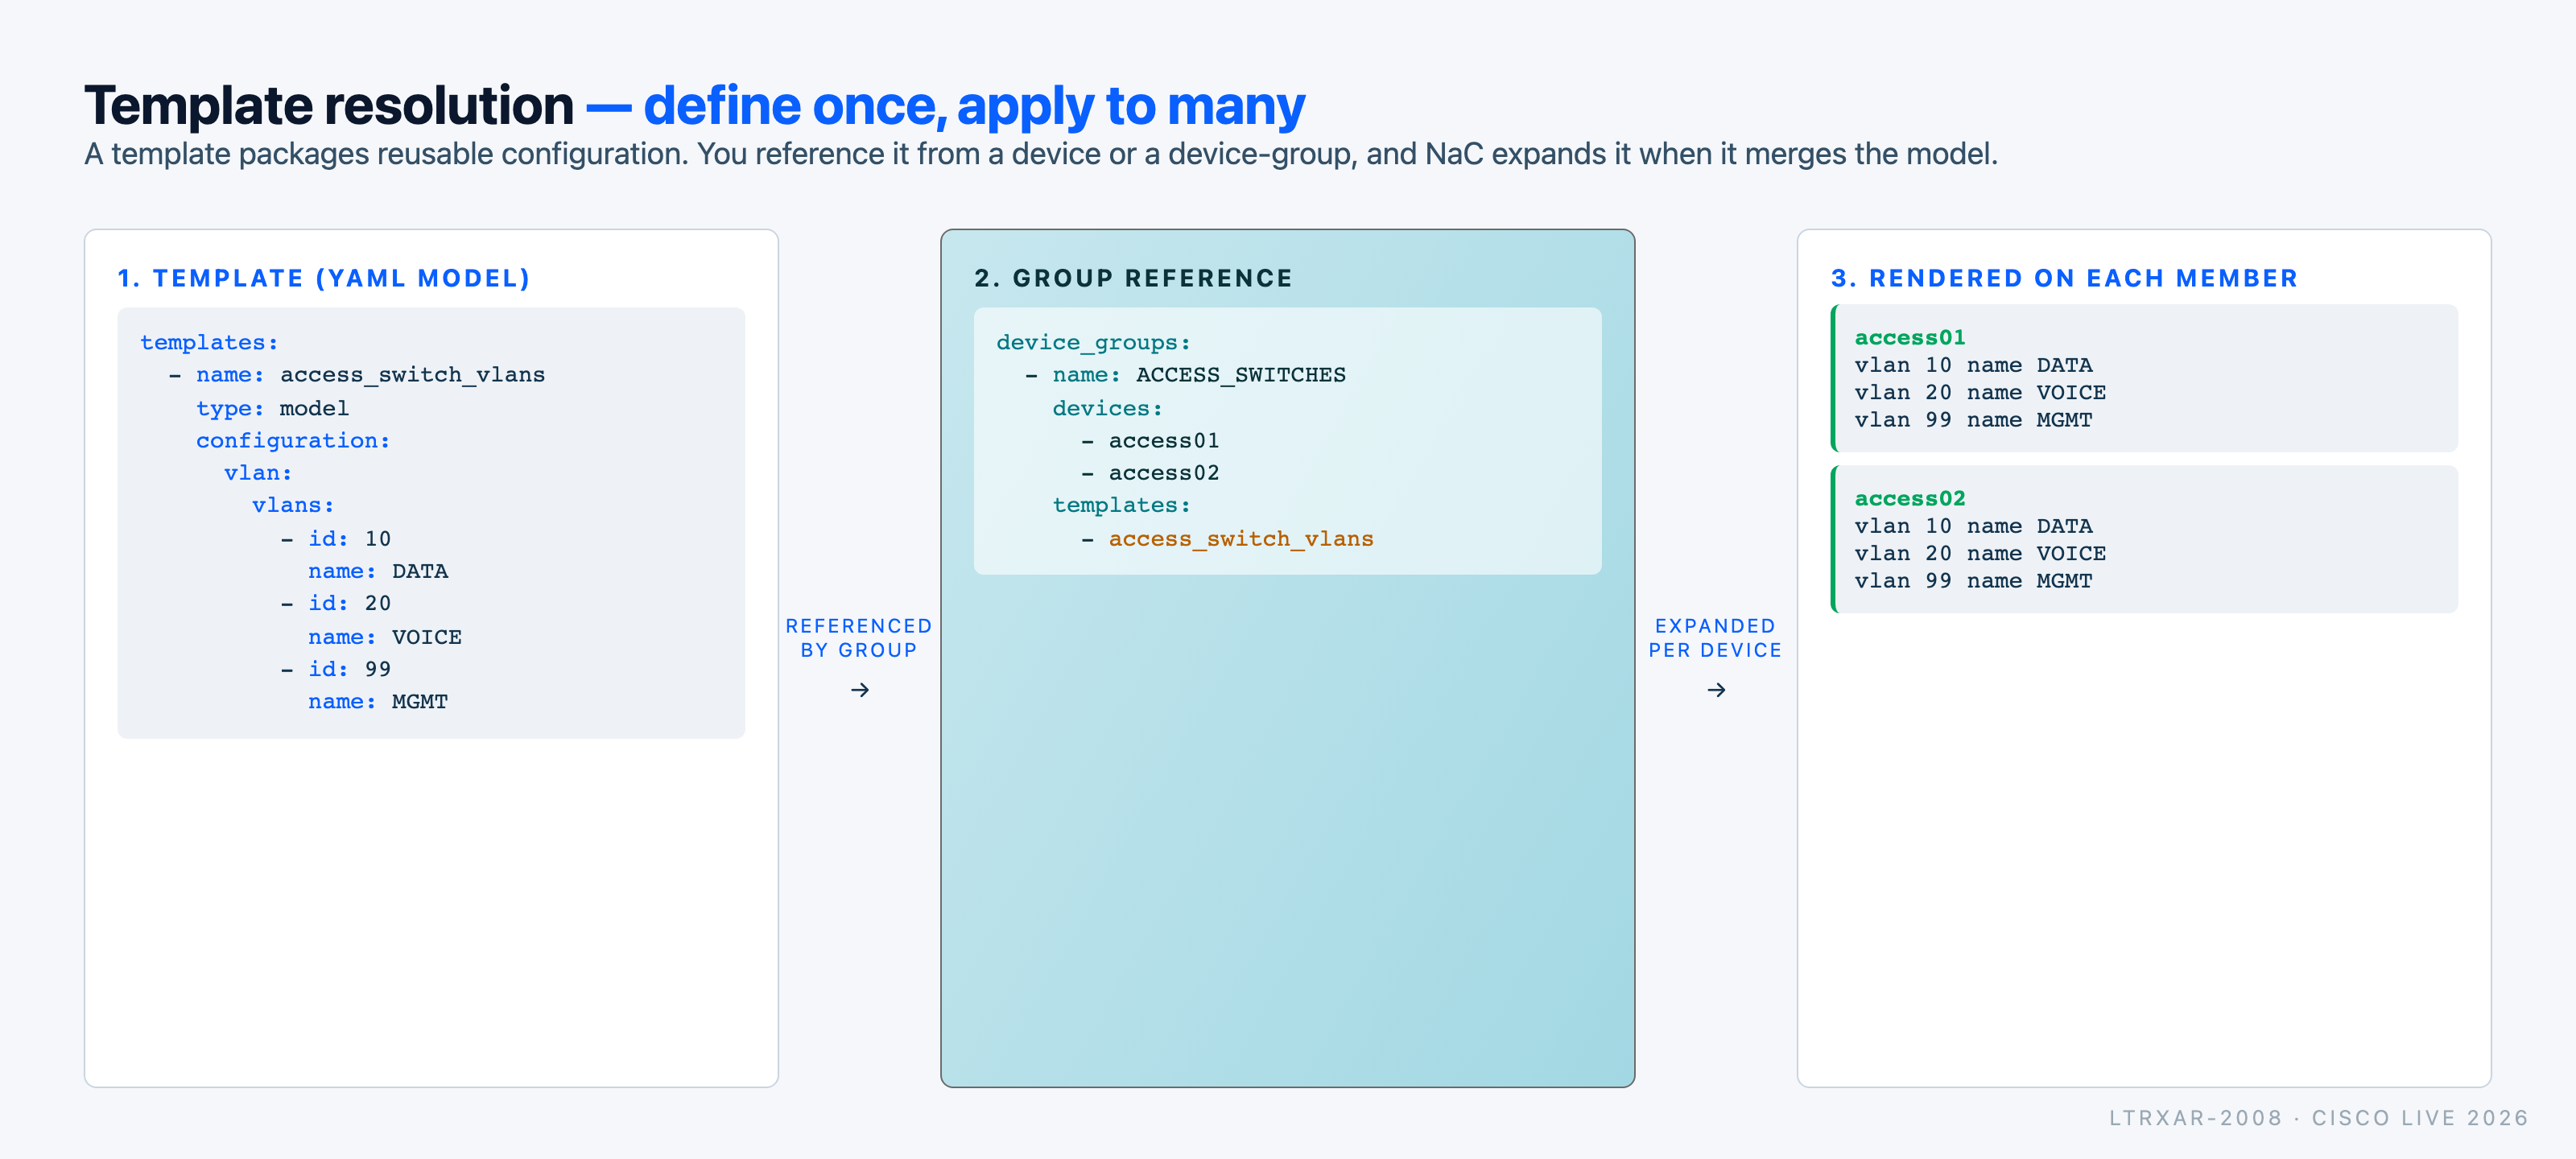
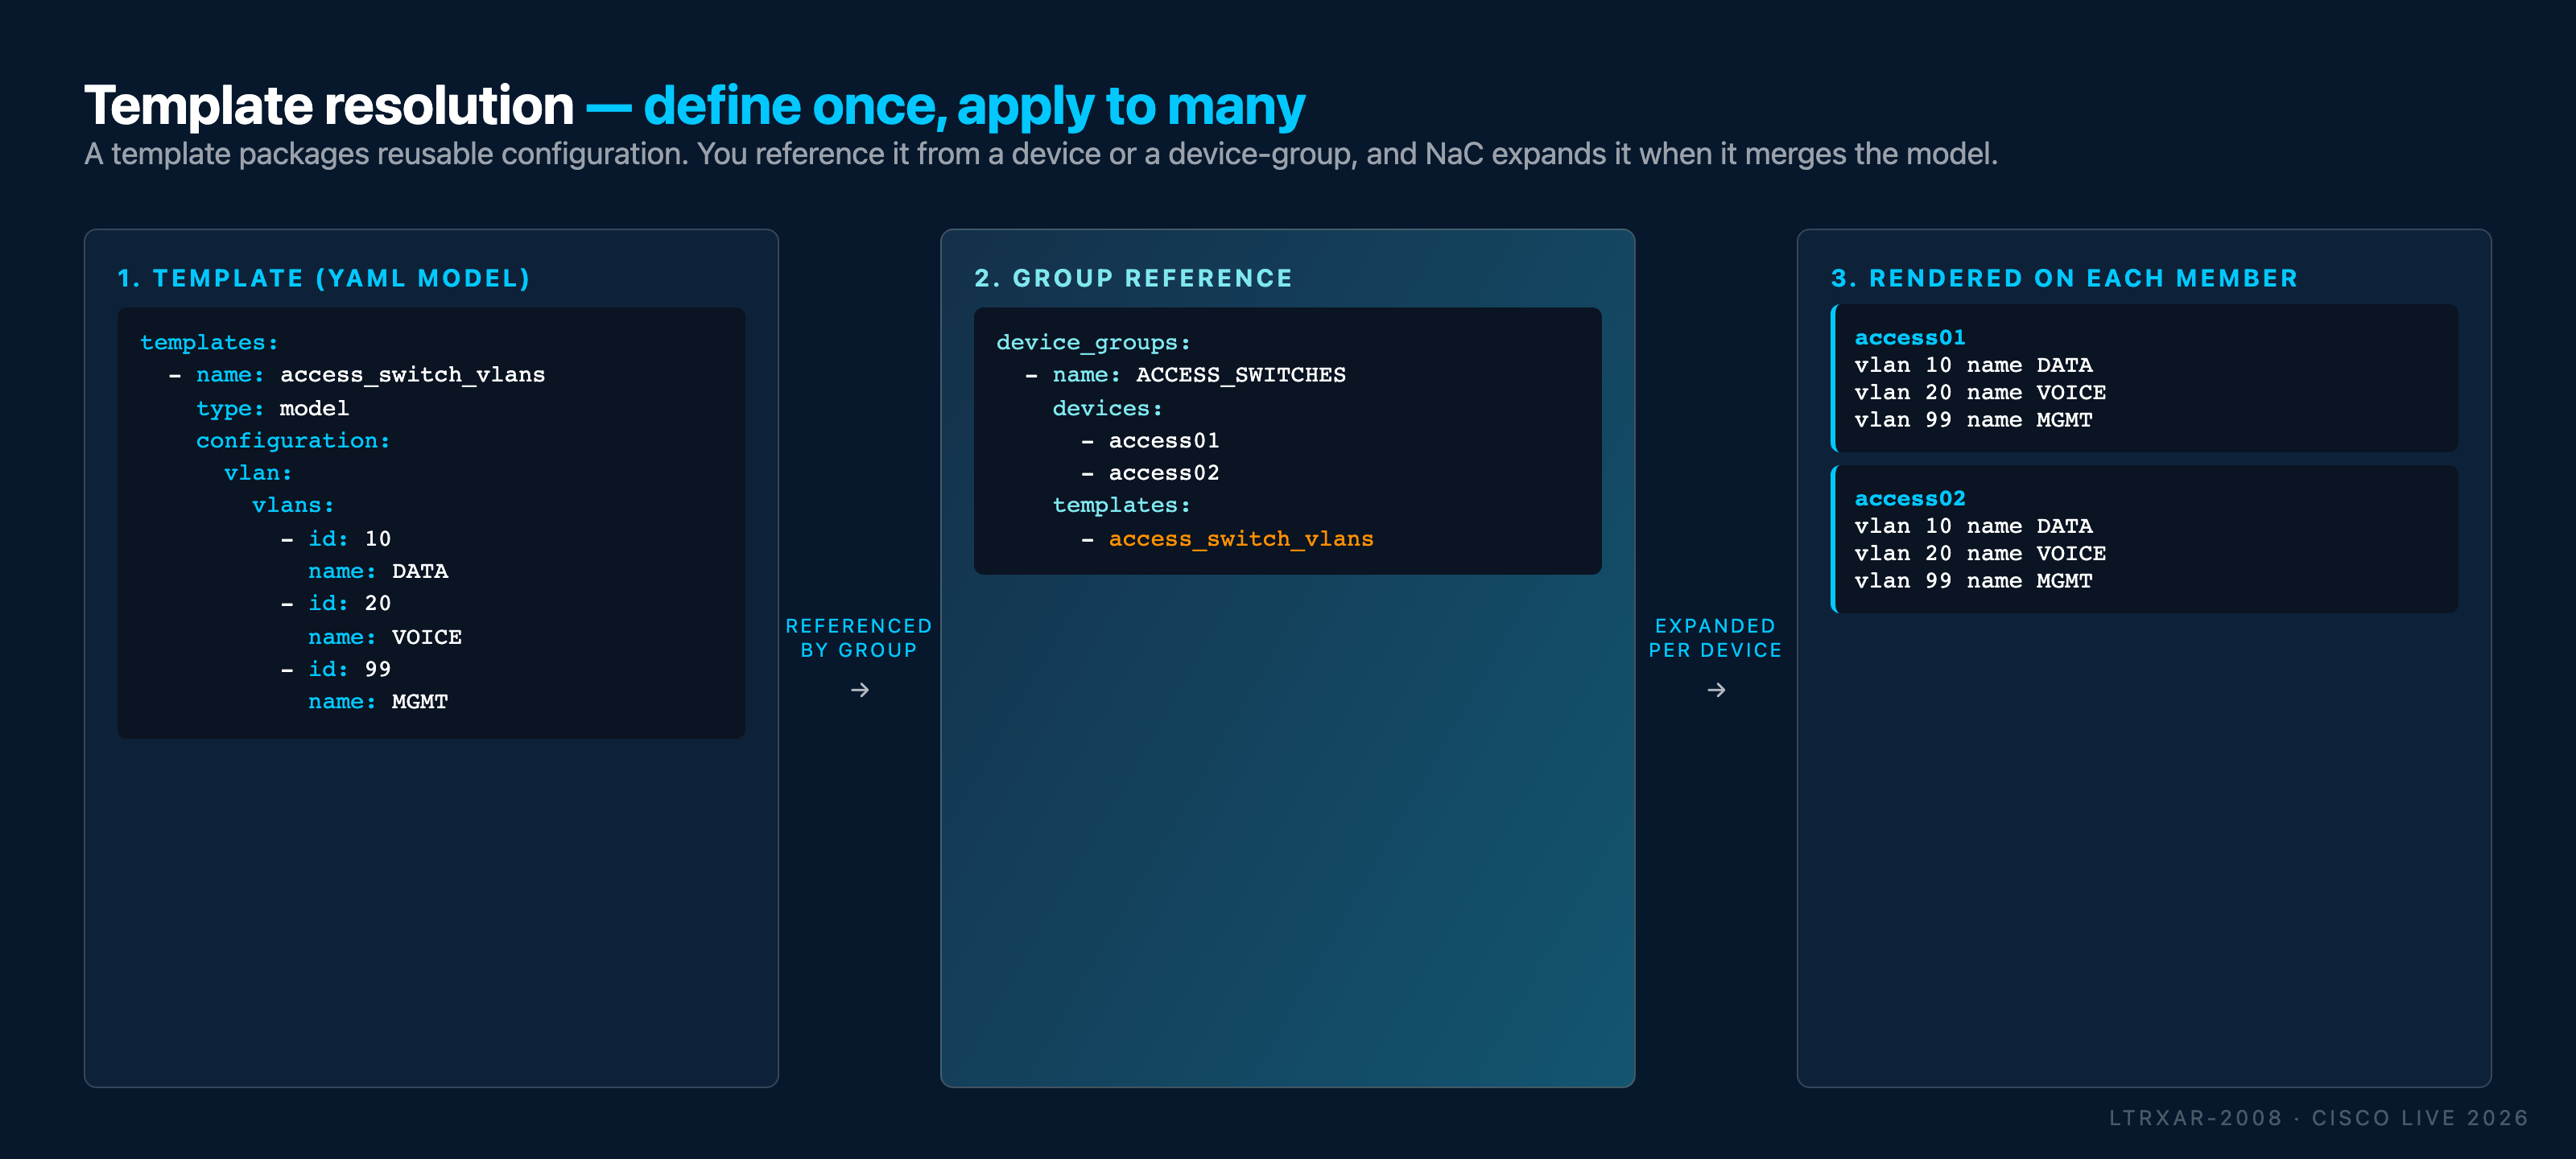
Step 3: Apply template configuration
Open your WSL Ubuntu terminal and run the following steps:
Navigate to your project directory:
Optionally, preview the changes Terraform will make:
Apply the configuration:
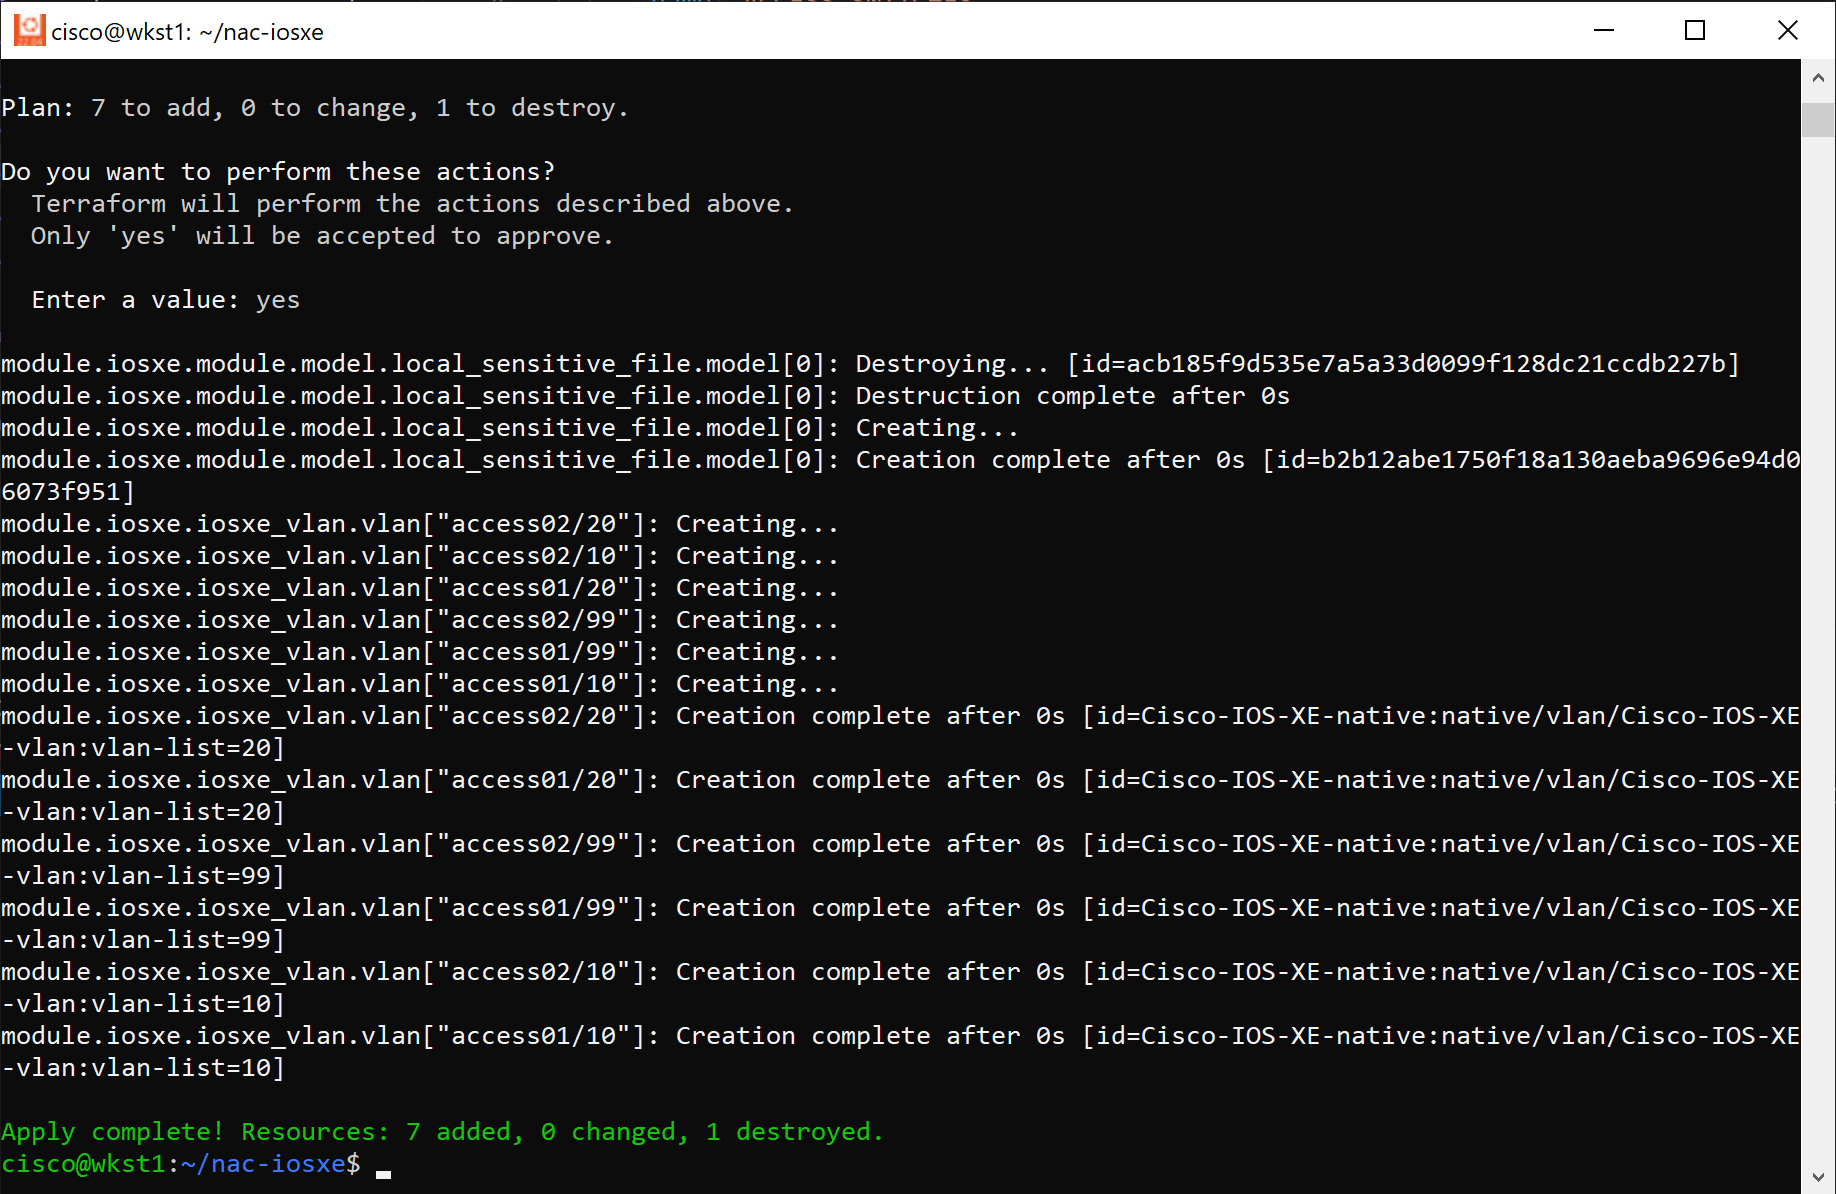
When prompted, type yes to confirm the deployment. Terraform will create the three VLANs on both access01 and access02 switches.
What to observe in the plan output:
- Terraform shows VLAN creation for access01
- Terraform shows VLAN creation for access02
- Both devices receive identical VLAN configuration
View the Merged Model
After running terraform apply, open the model.yaml file in VS Code to see how templates are rendered and merged with device configurations into a single data model. This is the same file used by Robot Framework for post-change validation in Task11.
Step 4: Verify template configuration
After successfully running terraform apply, verify that the VLANs were deployed to both access switches.
Use Solar-PuTTY to connect and verify:
- Open Solar-PuTTY from your desktop
- Connect to the access01 switch
- Run the verification command below
- Disconnect and repeat for access02 switch
Use the following command on both access01 and access02 switches to verify the VLANs:
access01#show vlan brief

VLAN Name                             Status    Ports
---- -------------------------------- --------- -------------------------------
1    default                          active    Gi1/0/1, Gi1/0/2, Gi1/0/3, Gi1/0/4,
                                                ...
                                                Gi1/0/21, Gi1/0/22, Gi1/0/23, Gi1/0/24
10   DATA                             active
20   VOICE                            active
99   MGMT                             active
1002 fddi-default                     act/unsup
1003 token-ring-default               act/unsup
1004 fddinet-default                  act/unsup
1005 trnet-default                    act/unsup
access01#
You should see all three VLANs (10-DATA, 20-VOICE, 99-MGMT) configured on both devices.
Templates vs other configuration methods
Here's a comparison of when to use templates versus other configuration approaches:
| Method | Best For | Examples |
|---|---|---|
| Global | Settings that apply to ALL devices | Login banners, NTP, Syslog |
| Device Group | Role or location based settings for device groups | ACLs for access layer, routing for core, timezone for site |
| Device | Unique settings for one device | Management IP hosts, special features |
| Template | Reusable configurations across selected devices | Standard VLANs, interface templates |
Templates give you fine-grained control - you choose exactly which devices get the template configuration by adding the template reference to each device.
Applying multiple templates
One of the most powerful features of templates is the ability to apply multiple templates to a device. This allows you to build modular, composable configurations where each template handles a specific aspect of the configuration.
For example, access switches might need:
- VLAN configuration (from
example_template_vlans) - QoS policies (from
example_template_qos) - Security settings (from
example_template_security)
Using device groups (as shown in this task), you can apply multiple templates to all group members:
Example: Working with Multiple Templates
The config below is only an example, you do not need to add this in your lab.
Benefits of using templates
- Single Source of Truth: VLAN definitions exist in one place
- Easy Updates: Need to add
VLAN 30? Update the template once, all devices get it - Selective Application: Not all devices need the same VLANs - only reference the template where needed
- Combine Multiple Templates: A device can reference multiple templates for different configuration aspects
- Separation of concerns: With multiple templates, each can handle one configuration domain
What you've accomplished
In this task, you have:
- ✅ Learned about templates and their benefits for Network as Code
- ✅ Created a reusable VLAN template (
access_switch_vlans) - ✅ Applied the template to multiple access switches
- ✅ Verified consistent VLAN deployment across devices
- ✅ Understood when to use templates vs global/group/device configurations
What's next
Task 08 introduces the file template type (external .tftpl files
with Jinja-style loops and conditionals - the template you'd reach for
when model templates aren't expressive enough). If you're only
sampling one template type, skipping ahead to
Task 10 - Schema validation is fine.
← Previous: Task 06 - Variables · Next: Task 08 - Templates 'file'