Task 02 - Editing YAML files in VS Code
Estimated Time to Complete: ~15 minutes
In this task you'll set up the project directory and use VS Code to edit Network as Code IOS XE intent configuration YAML files.
What you'll learn
By the end of this task you will have:
- Set up an IOS XE as Code project directory under
~/nac-iosxe/in WSL - Edited YAML configuration files using VS Code and the Red Hat YAML extension
- Registered all four lab devices in their own per-device YAML files
Create the project directory
You'll create a dedicated project directory in your Windows Subsystem for Linux (WSL) home directory to organize your Network as Code configuration files and related resources. This location will serve as your workspace for storing YAML configuration files, Terraform files, and state information.
What is WSL?
Windows Subsystem for Linux (WSL) allows you to run a Linux environment directly on Windows without a virtual machine. WSL is pre-installed in this lab, and you'll use it to run Terraform commands because most DevOps tools are designed for Linux.
Open WSL terminal (Ubuntu)
Open Windows Subsystem for Linux (WSL) terminal. You can use the desktop shortcut, the icon on the taskbar, or on the Start menu.
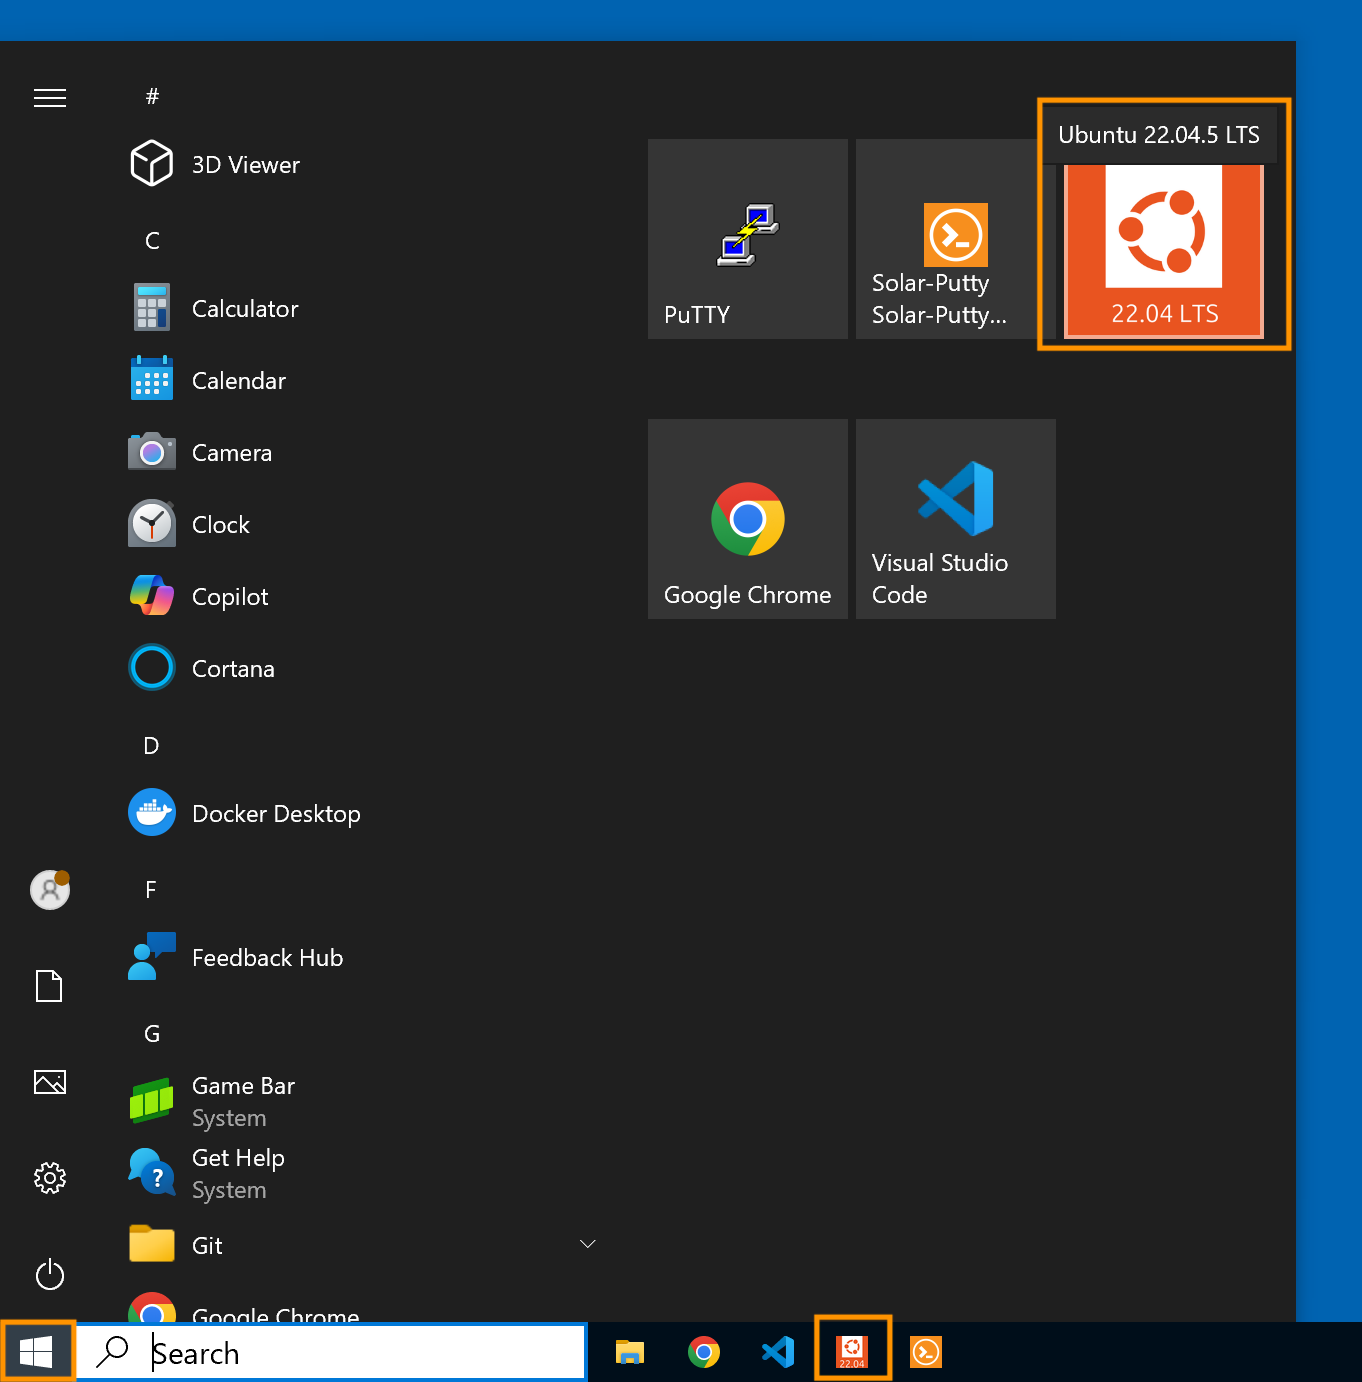
When you open WSL, you'll automatically start in your home directory (/home/cisco or ~/).
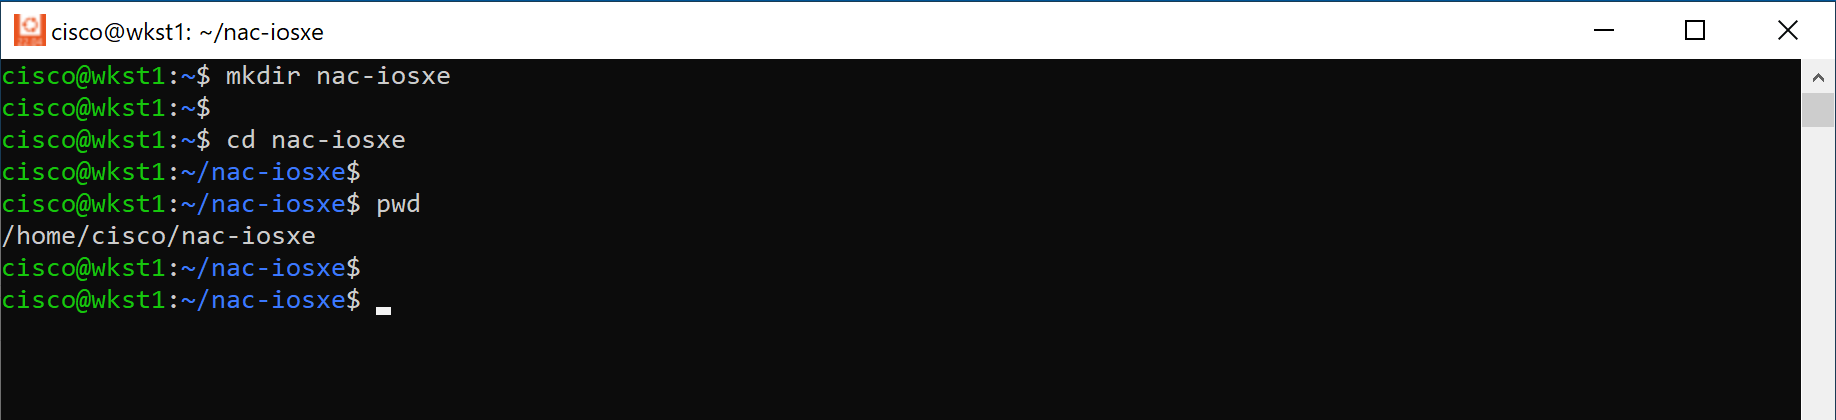
Verify your current location:
You should see /home/cisco displayed.

Create the IOS XE as Code project directory:
Copy and Paste
You can copy commands directly from this lab guide by clicking on the icon at the top right corner of the command block and paste them into the WSL terminal using right-click.
This creates a dedicated folder named nac-iosxe for all your Network as Code IOS XE project files.
Navigate into the new directory:
Verify you're in the correct location:
You should now see /home/cisco/nac-iosxe displayed.
Create project structure
Now you'll create a folder structure and placeholder files for your Network as Code IOS XE project.
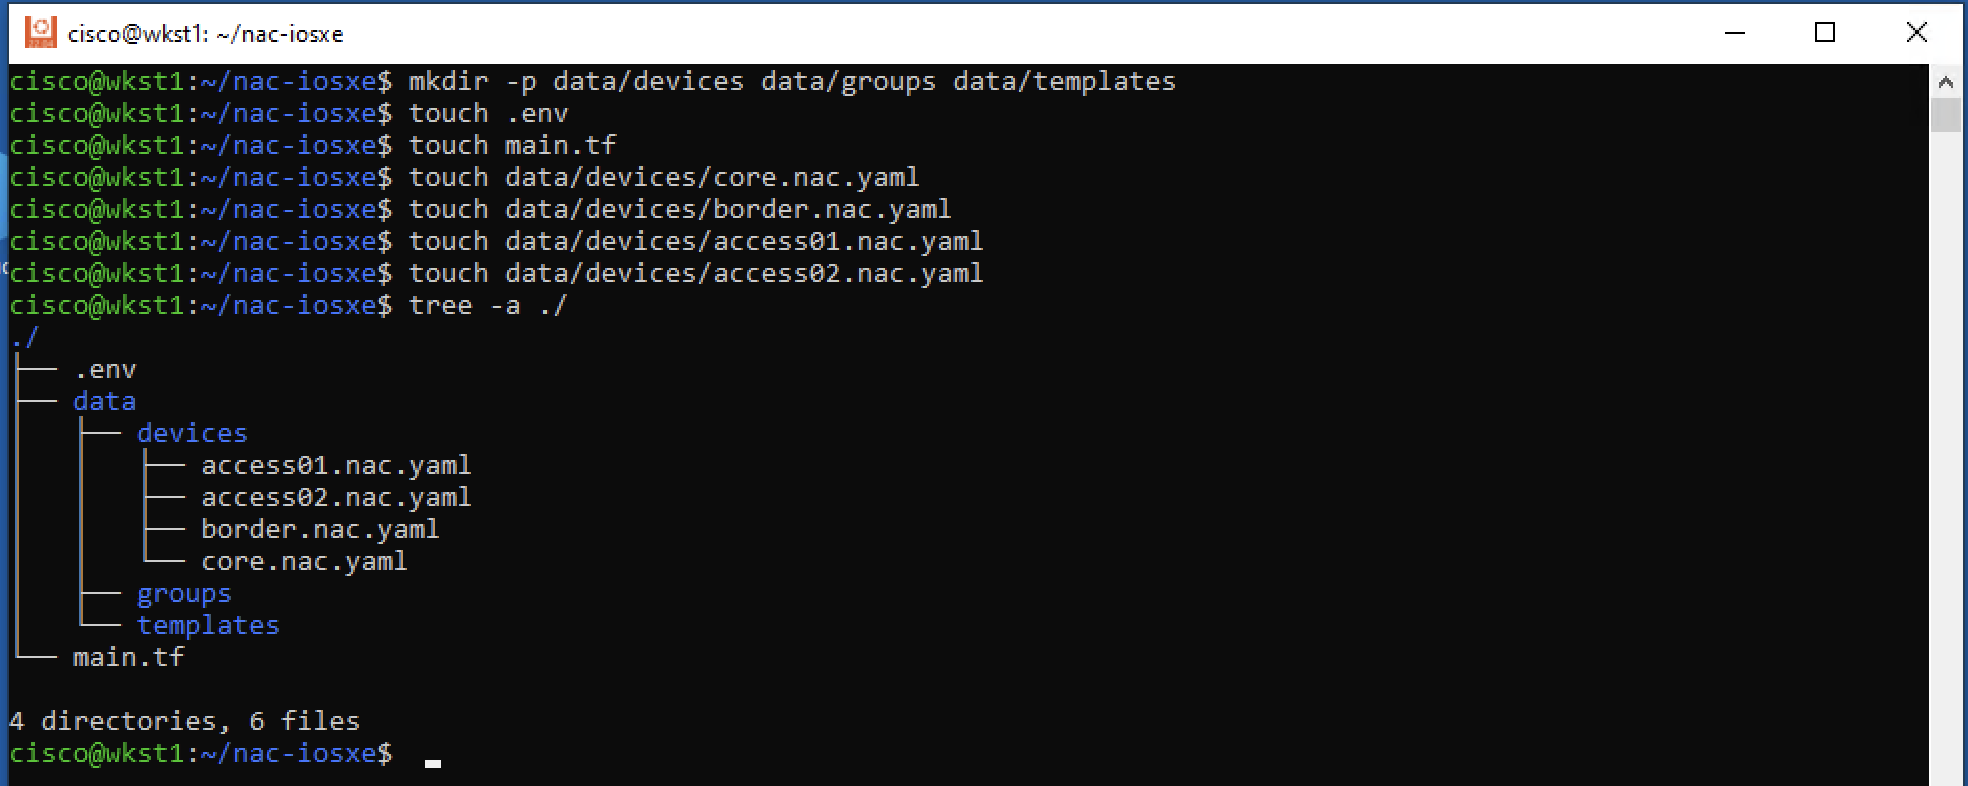
Create the data directory structure:
This creates a data/ folder with subdirectories to organize your configuration by scope: devices/ for per-device files, groups/ for device-group files, and templates/ for reusable template definitions.
Create placeholder files
Create the skeleton files you'll fill in below.
touch .env                                        # credentials for the IOS XE devices
touch main.tf                                     # Terraform entry point
touch data/devices/core.nac.yaml                  # per-device configuration files
touch data/devices/border.nac.yaml
touch data/devices/access01.nac.yaml
touch data/devices/access02.nac.yaml
One file per device is the pattern you'll use for the whole lab. It keeps each device's configuration self-contained and makes it obvious which YAML file to edit when you need to change something for a specific device.
Why one file per device, not a single inventory file?
The IOS XE as Code data model exposes a top-level iosxe.devices list. YAML allows the same list to be split across multiple files and merged at load time - but only if every list entry is uniquely identified by its name field. Defining each device in its own file (with its own name) keeps that invariant obvious, and it scales cleanly: adding a device later is "create one file," not "edit three."
The pattern works because Network as Code merges entries across files by the name field. If you typo a device's name in one file, you'll end up with two separate entries instead of one merged one - it's the single most common way a learner's config silently misbehaves. You'll see merge behavior in detail in Task 04 once you have three files contributing to one device's config at once.
Verify your project structure
You should see:
cisco@wkst1:~/nac-iosxe$ tree -a
.
├── .env
├── data
│   ├── devices
│   │   ├── access01.nac.yaml
│   │   ├── access02.nac.yaml
│   │   ├── border.nac.yaml
│   │   └── core.nac.yaml
│   ├── groups
│   └── templates
└── main.tf

4 directories, 6 files
You're now ready to populate the files. Every subsequent step in this guide assumes your current working directory is /home/cisco/nac-iosxe.
Open Visual Studio Code
Now that the project structure exists, you'll open it in VS Code to edit the files.
What is VS Code?
Visual Studio Code, commonly known as VS Code, is a free, lightweight, yet powerful source code editor developed by Microsoft. It runs on Windows, macOS, and Linux and has become one of the most popular code editors among developers and IT professionals.
Key features that make VS Code ideal for Network as Code:
- Syntax highlighting - Colors and formats YAML files for easy readability
- IntelliSense - Provides intelligent code completion and suggestions
- Integrated terminal - Run commands directly within the editor
- Extensions - Add functionality like YAML validators and schema support
- Git integration - Built-in version control for tracking changes
- Multi-file editing - Work with multiple configuration files simultaneously
- File explorer - Easy navigation through project folders and files
YAML linting with RedHat extension (pre-installed)
Since Network as Code configurations are written in YAML, having proper syntax validation is essential. VS Code supports YAML linting through the YAML extension by Red Hat, which helps catch syntax errors and enforce best practices as you write your configuration files.
Pre-installed in your lab VM
This extension is already installed in your lab's VS Code - no action required.
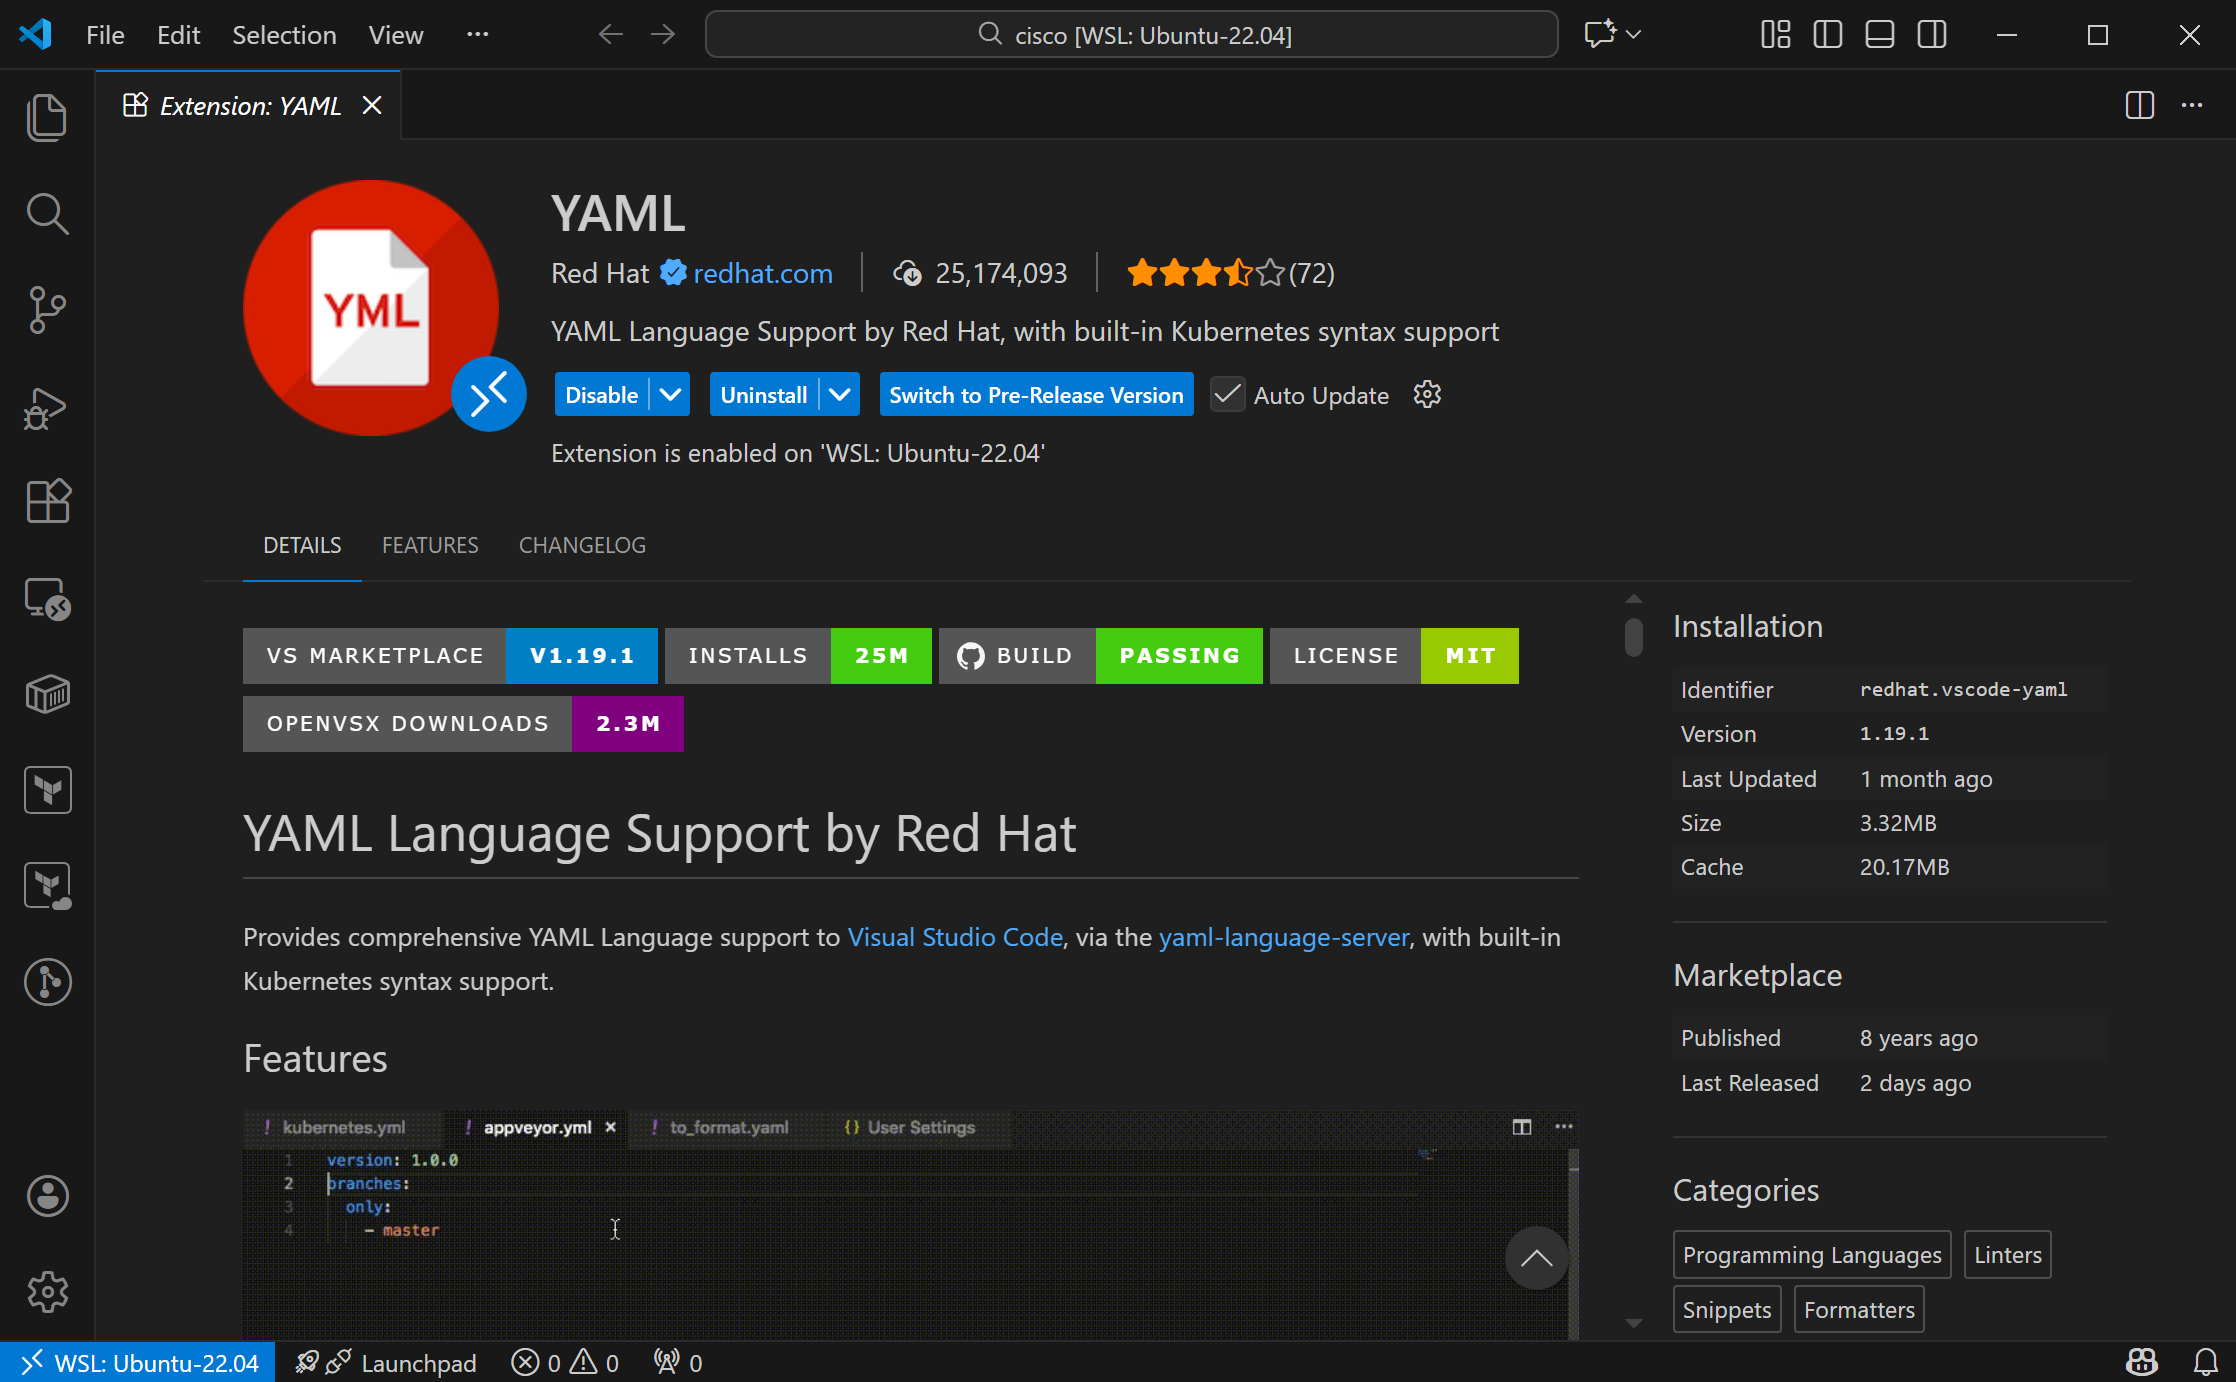
This extension provides:
- Real-time syntax validation - Highlights errors as you type
- Auto-completion - Suggests valid YAML structures
- Formatting - Automatically formats your YAML files
- Schema validation - Can validate against predefined schemas
File Extension
The YAML extension recognizes only files ending with .nac.yaml as Network as Code YAML files. To benefit from the VS Code extension, ensure your configuration files end with .nac.yaml.
Open the project folder
To open the folder in VS Code:
- Double-click the Visual Studio Code Code icon on the Windows desktop
- Click File → Open Folder
- In the address bar, type or paste:
/home/cisco/nac-iosxe - Click OK
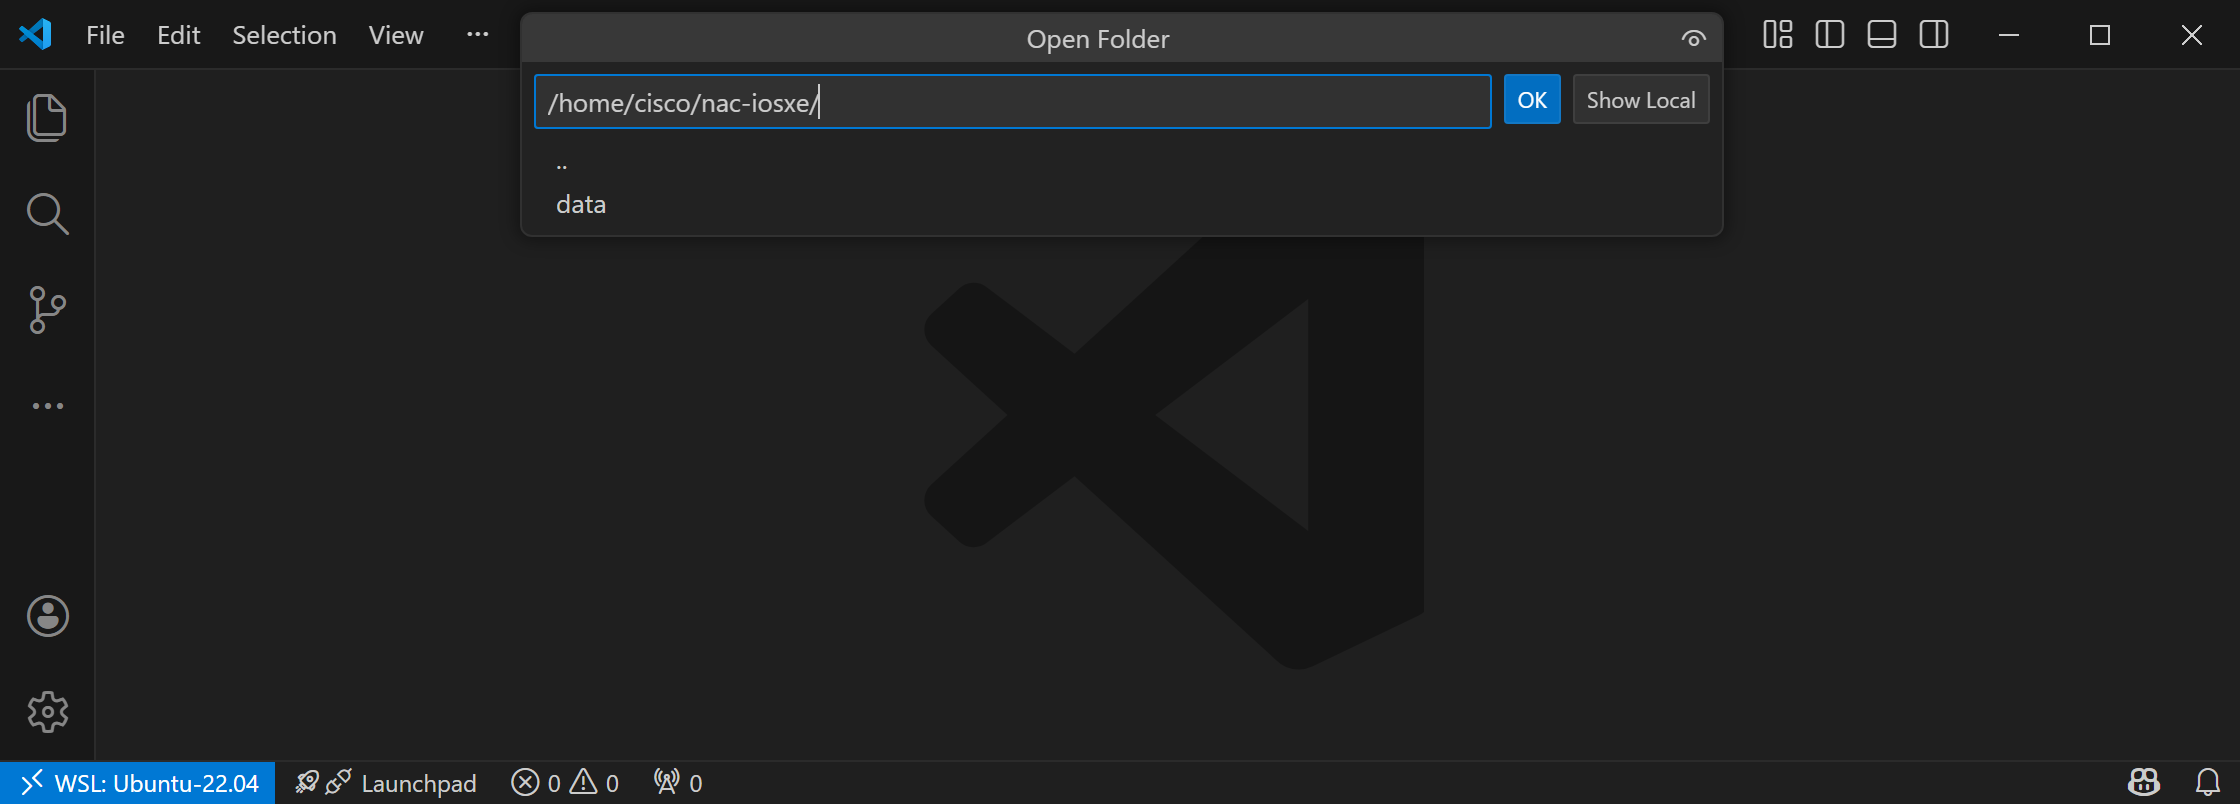
VS Code automatically connects to WSL (pre-configured)
The WSL VS Code extension is pre-installed, so VS Code connects to your Ubuntu environment automatically.
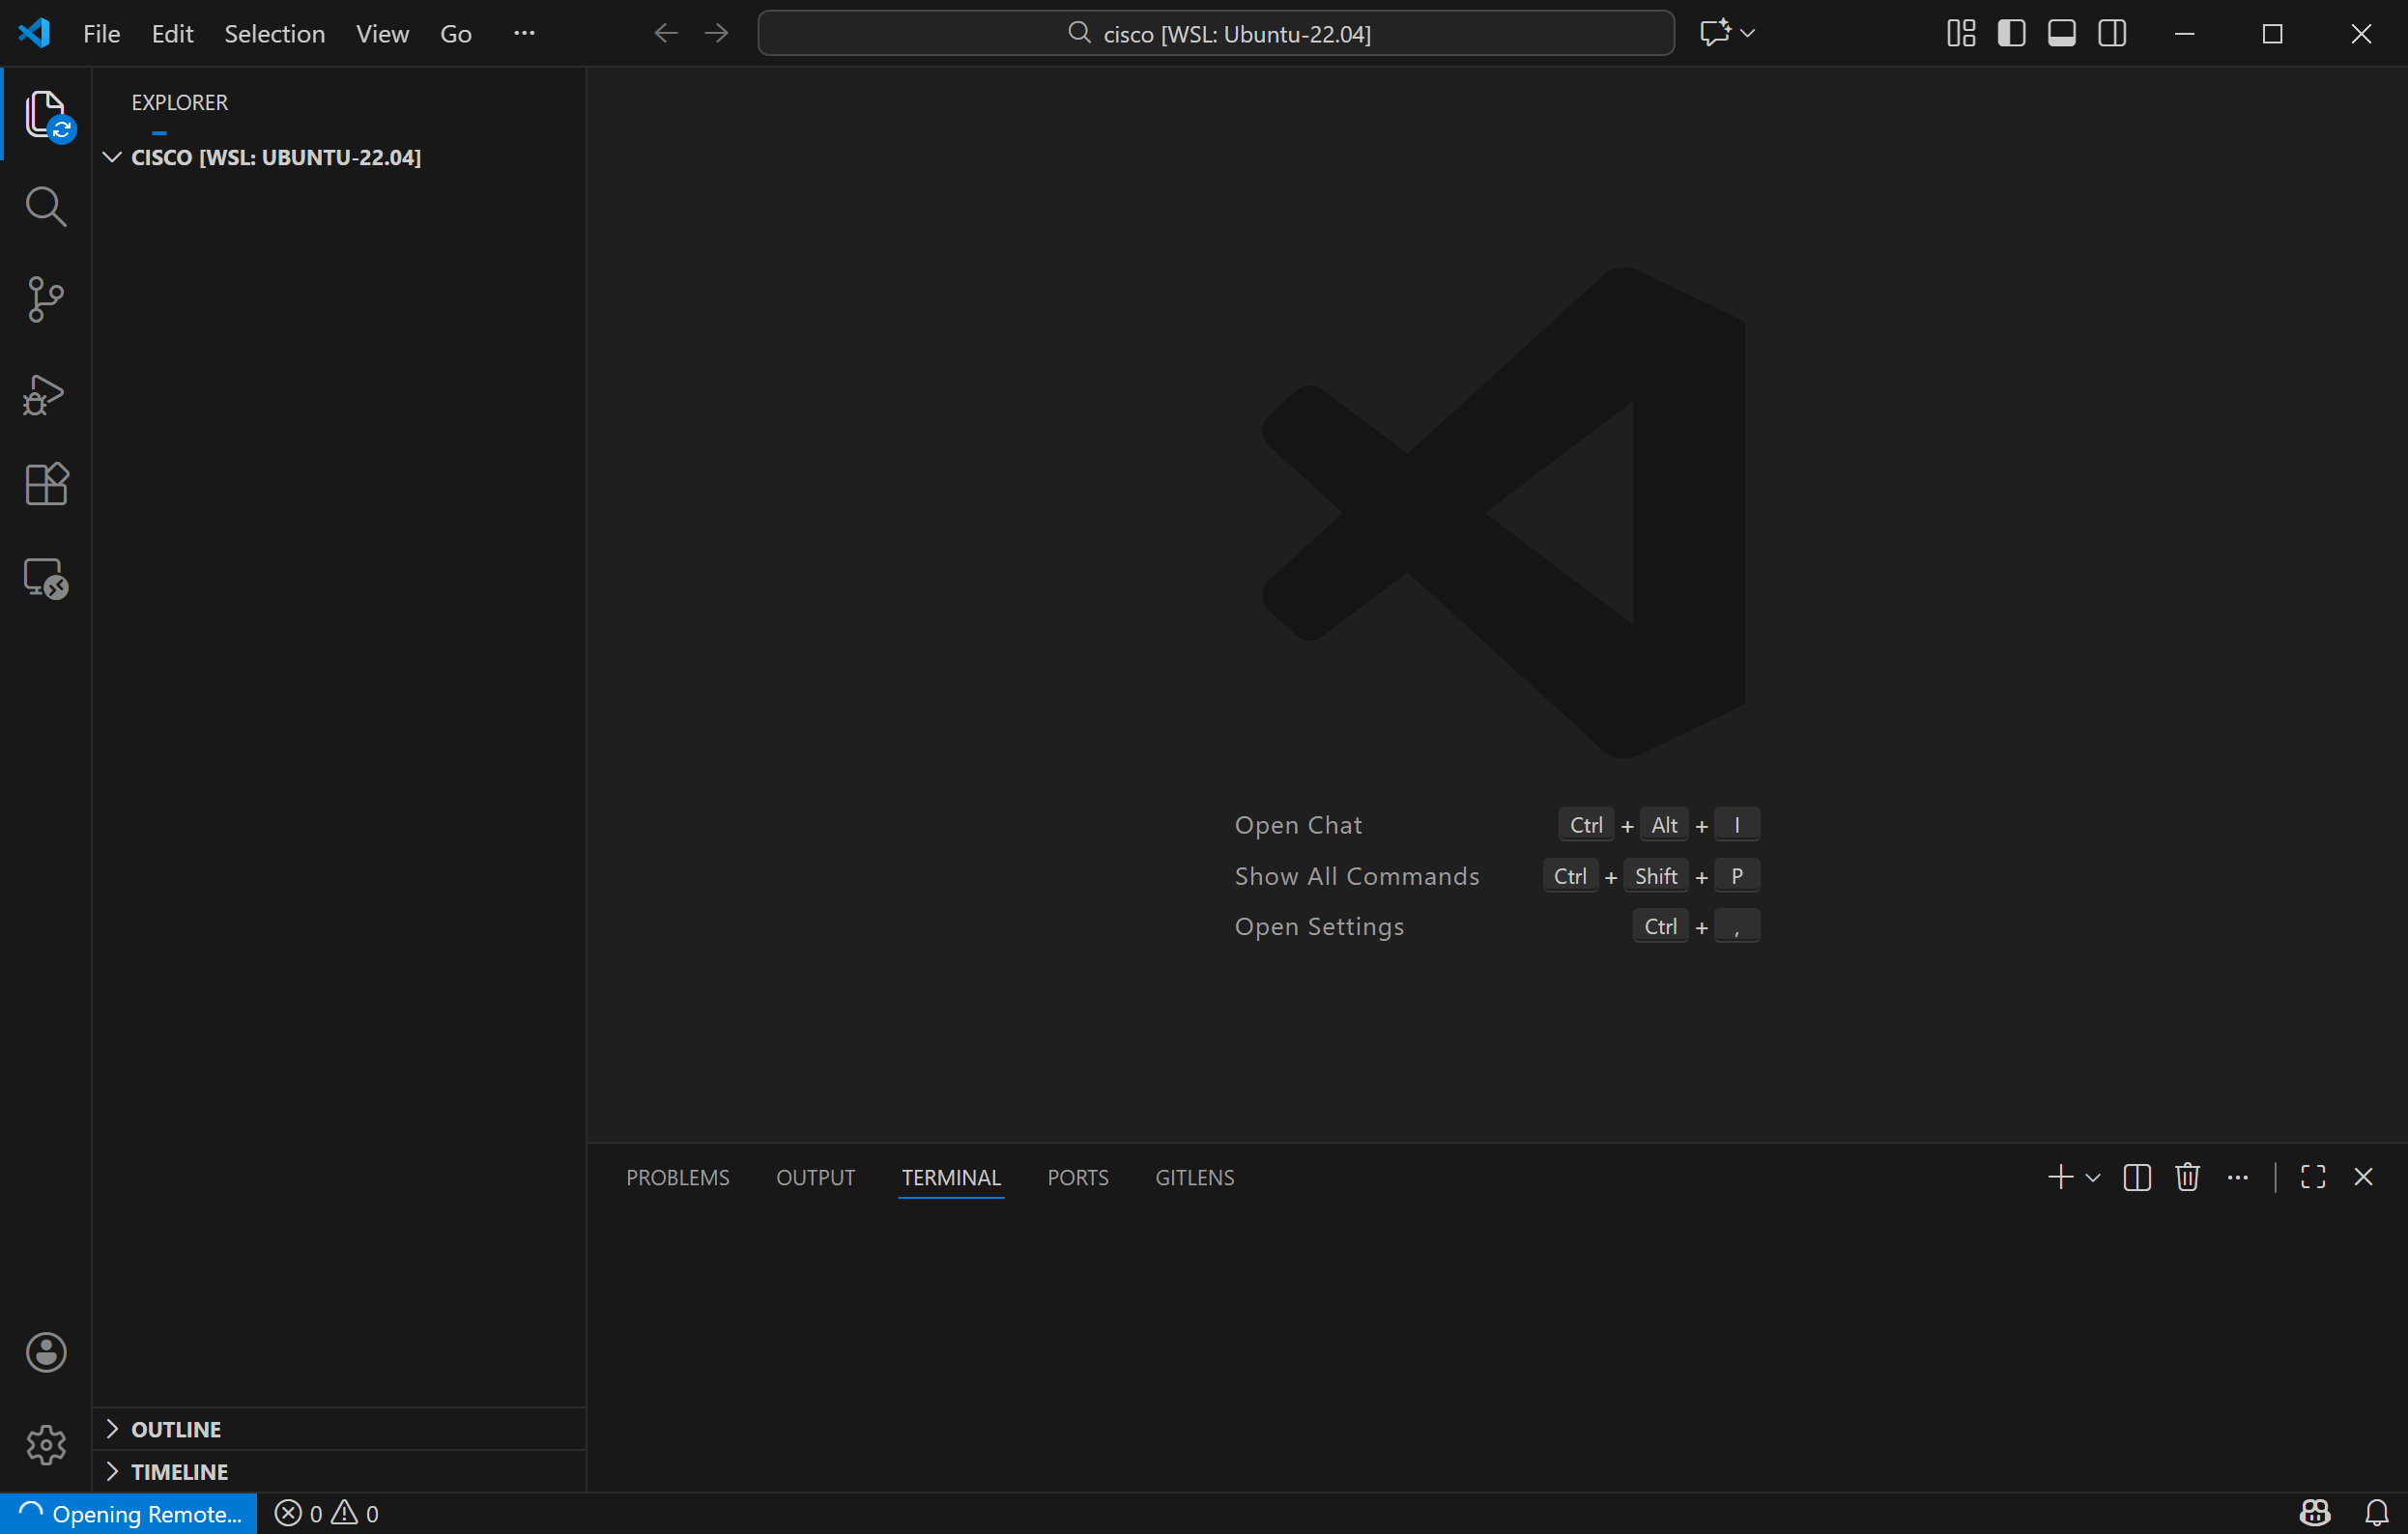
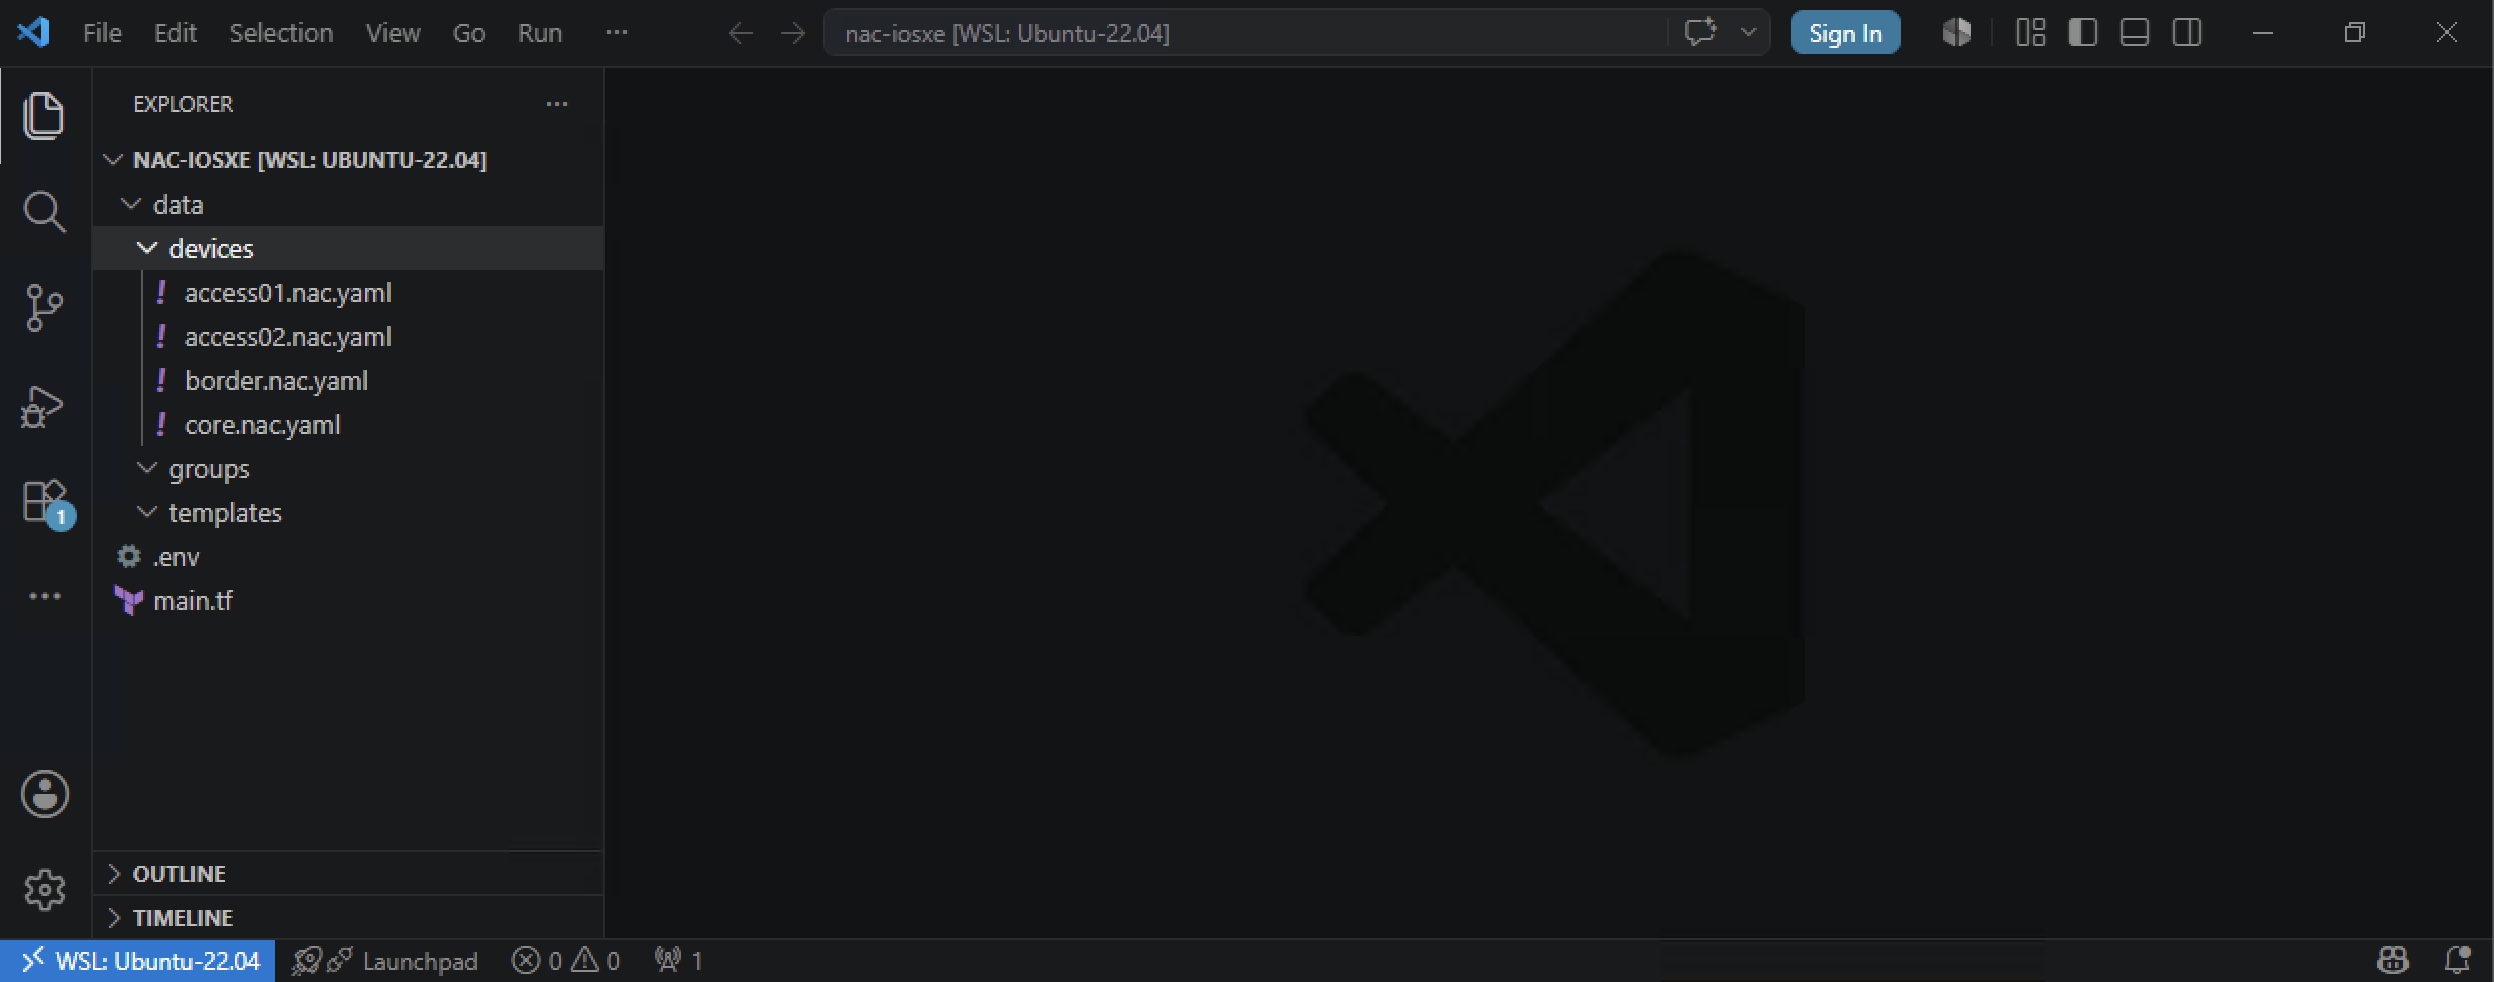
You'll see a WSL: Ubuntu-22.04 indicator in the bottom-left corner confirming the connection - files you edit in VS Code are saved directly to the WSL filesystem.
VS Code will now open with your project folder, and you'll see the file explorer on the left showing your three configuration files.
Edit .env file
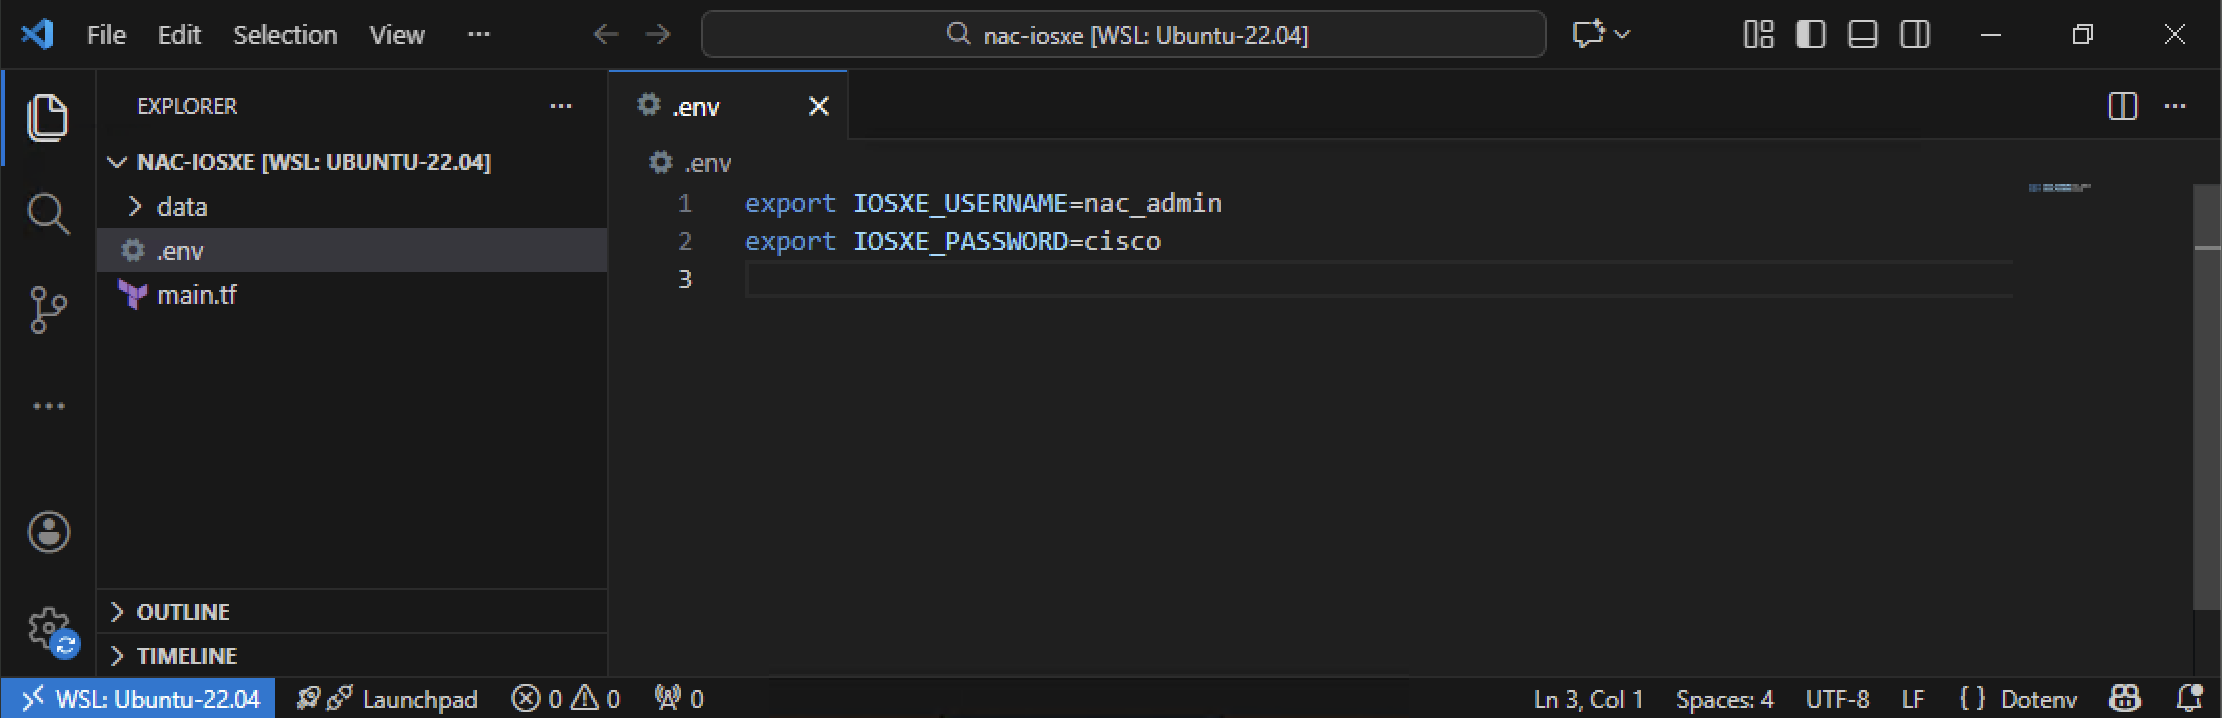
Edit .env file containing the environment variables required by the Network as Code Terraform modules to connect to the Cisco IOS XE devices. This file stores your IOS XE credentials and connection details in a secure and reusable format:
The figure below illustrates how to edit the .env file using Visual Studio Code:
Load the environment variables
After saving the file, switch to your WSL Ubuntu terminal and source it so the variables are available to Terraform:
You won't see any output - that's expected. The export statements silently place the variables into your shell session.
Never commit .env to a real repository
The .env file holds device credentials in plaintext. In this lab it's harmless (every attendee has the same throwaway lab switches), but in a real project add .env to your .gitignore before the first commit. If credentials ever land on a feature branch and are pushed, rotate them - deleting the file from history isn't enough.
If source .env fails with a weird error, check line endings
VS Code on Windows sometimes saves files with Windows-style (CRLF) line endings. WSL's Bash chokes on those in a sourced file. If source .env errors, run dos2unix .env in the WSL terminal and try again. You can also configure VS Code to always use LF - see the status-bar indicator at the bottom-right of the editor window.
Edit Terraform main.tf file
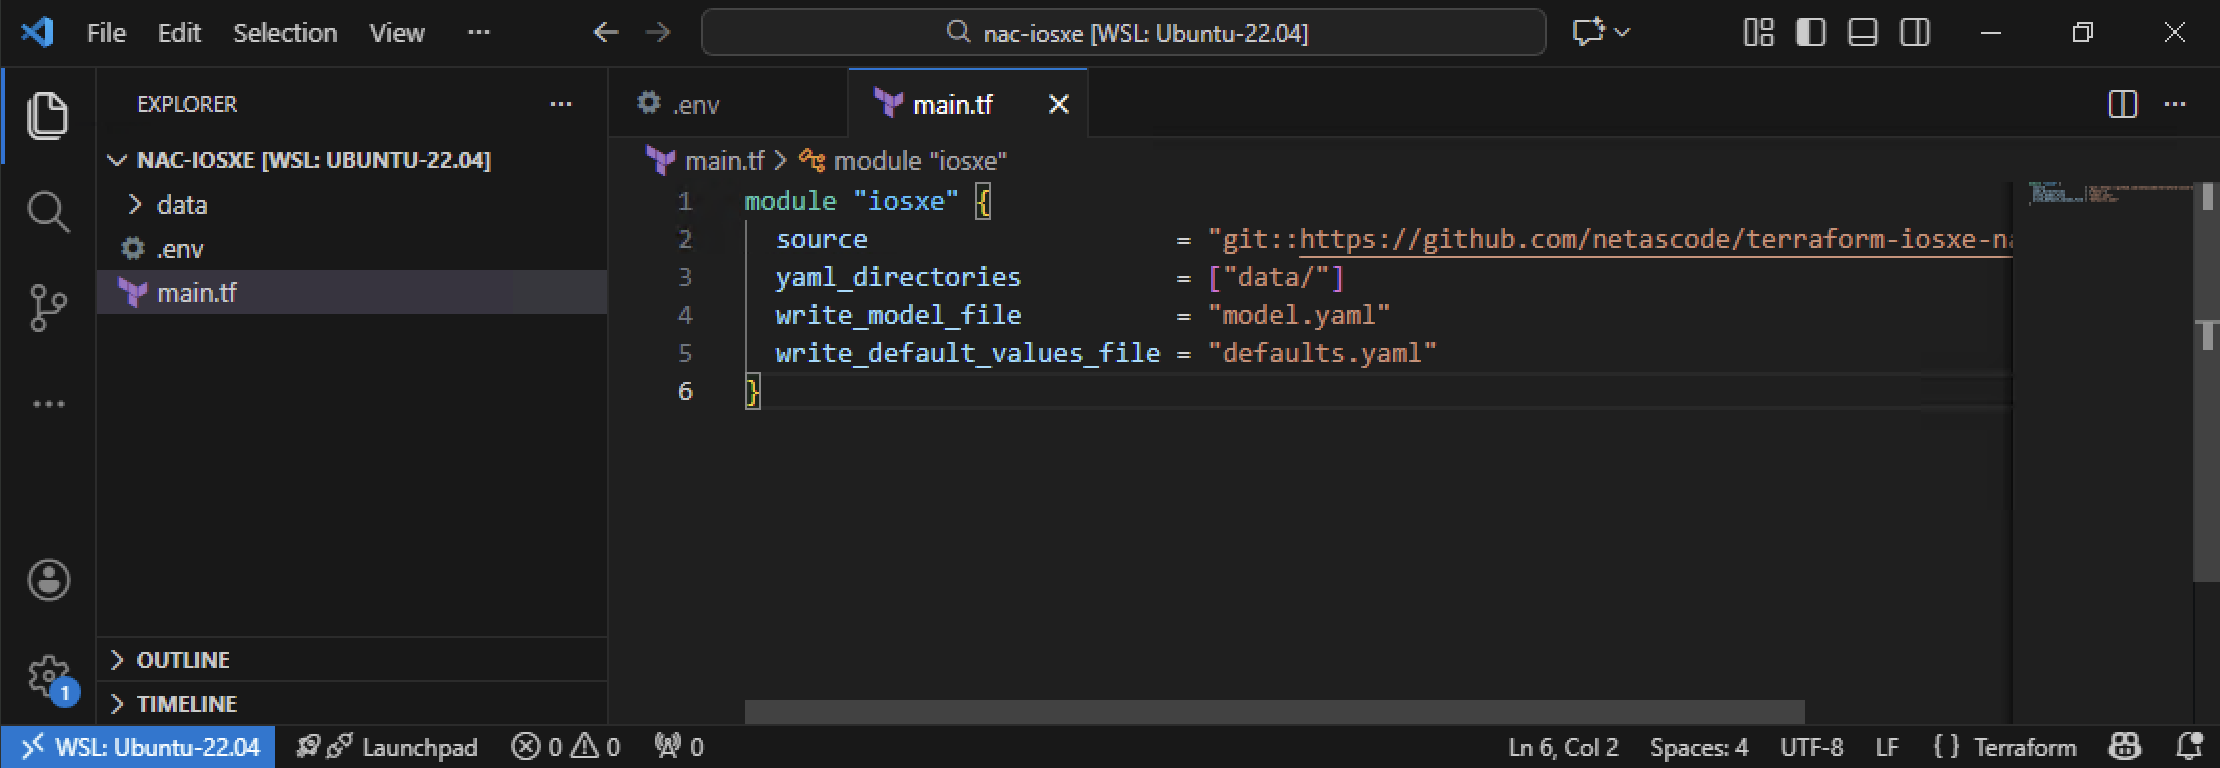
Next, edit a Terraform main.tf file with the following content. This file serves as the entry point for the Terraform configuration and defines the necessary resources and modules to interact with the IOS XE device:
module "iosxe" {
  source                    = "git::https://github.com/netascode/terraform-iosxe-nac-iosxe.git"
  yaml_directories          = ["data/"]
  write_model_file          = "model.yaml"
  write_default_values_file = "defaults.yaml"
}
Formatting matters
Terraform (.tf) files use braces {} and indentation for structure. Unlike YAML, Terraform is forgiving about whitespace, but consistent formatting makes your code readable. The snippets in this guide are formatted with terraform fmt; if you type manually, run terraform fmt after to clean up.
Understanding the configuration:
module "iosxe"- declares a Terraform module namediosxe. Modules package reusable Terraform logic; you invoke them withmodule.iosxe.source = "git::https://github.com/netascode/terraform-iosxe-nac-iosxe.git"- tells Terraform where to fetch the module. This is the Cisco-maintained Network as Code module that translates your YAML into the low-level resource calls theterraform-provider-iosxeunderstands.yaml_directories = ["data/"]- tells the module which directories to scan for YAML. Every*.nac.yamlfile insidedata/is auto-discovered and merged. This is why you can split configurations across many files without wiring them up individually.write_model_file = "model.yaml"- after merging, the module writes the final merged data model tomodel.yaml. You'll use this file to debug variable substitution and as input tonac-testfor post-deployment validation.write_default_values_file = "defaults.yaml"- similar, but for the default values the module applies when your YAML omits a field. Useful for understanding "where did this setting come from?"
Why no version pin?
For the lab we source directly from the module's default branch (main) to always get the latest schema and features. In production you should pin to a specific tag or commit (for example, ?ref=v0.12.3) so every terraform init yields a reproducible build. Unpinned sources are convenient for experimentation but will occasionally break learners when upstream ships schema changes - pin once you ship.
The figure below illustrates the main.tf file in Visual Studio Code:
Populate the per-device files
Each per-device file registers one device with Network as Code - it declares the device's name (which every other YAML file will reference) and its management IP address. You'll add actual configuration to these files in later tasks.
Open data/devices/core.nac.yaml in VS Code and paste:
Open data/devices/border.nac.yaml and paste:
Open data/devices/access01.nac.yaml and paste:
Open data/devices/access02.nac.yaml and paste:
Indentation matters in YAML
YAML uses spaces (not tabs) and relies on consistent indentation to express structure. Each level of nesting should be exactly 2 spaces. Copy-pasting from this guide preserves the right indentation; if you type manually, watch for the red squiggles from the VS Code YAML extension - they point at exactly the line that's off.
What each key means:
---- YAML document-start marker (optional but conventional).iosxe:- root key. Every IOS XE as Code YAML starts here.devices:- the top-level list of devices Network as Code manages.name:- unique identifier for the device. Other YAML files will match against this name.host:- management IP Network as Code connects to.
Why one device per file?
Network as Code merges all YAML files in data/ into a single data model at load time. Because devices is a list, keeping each device in its own file makes it immediately obvious which file owns which device, and avoids the accidental-merge bugs that can happen when several files all append to the same list. You'll extend these files with real configuration starting in Task 05.
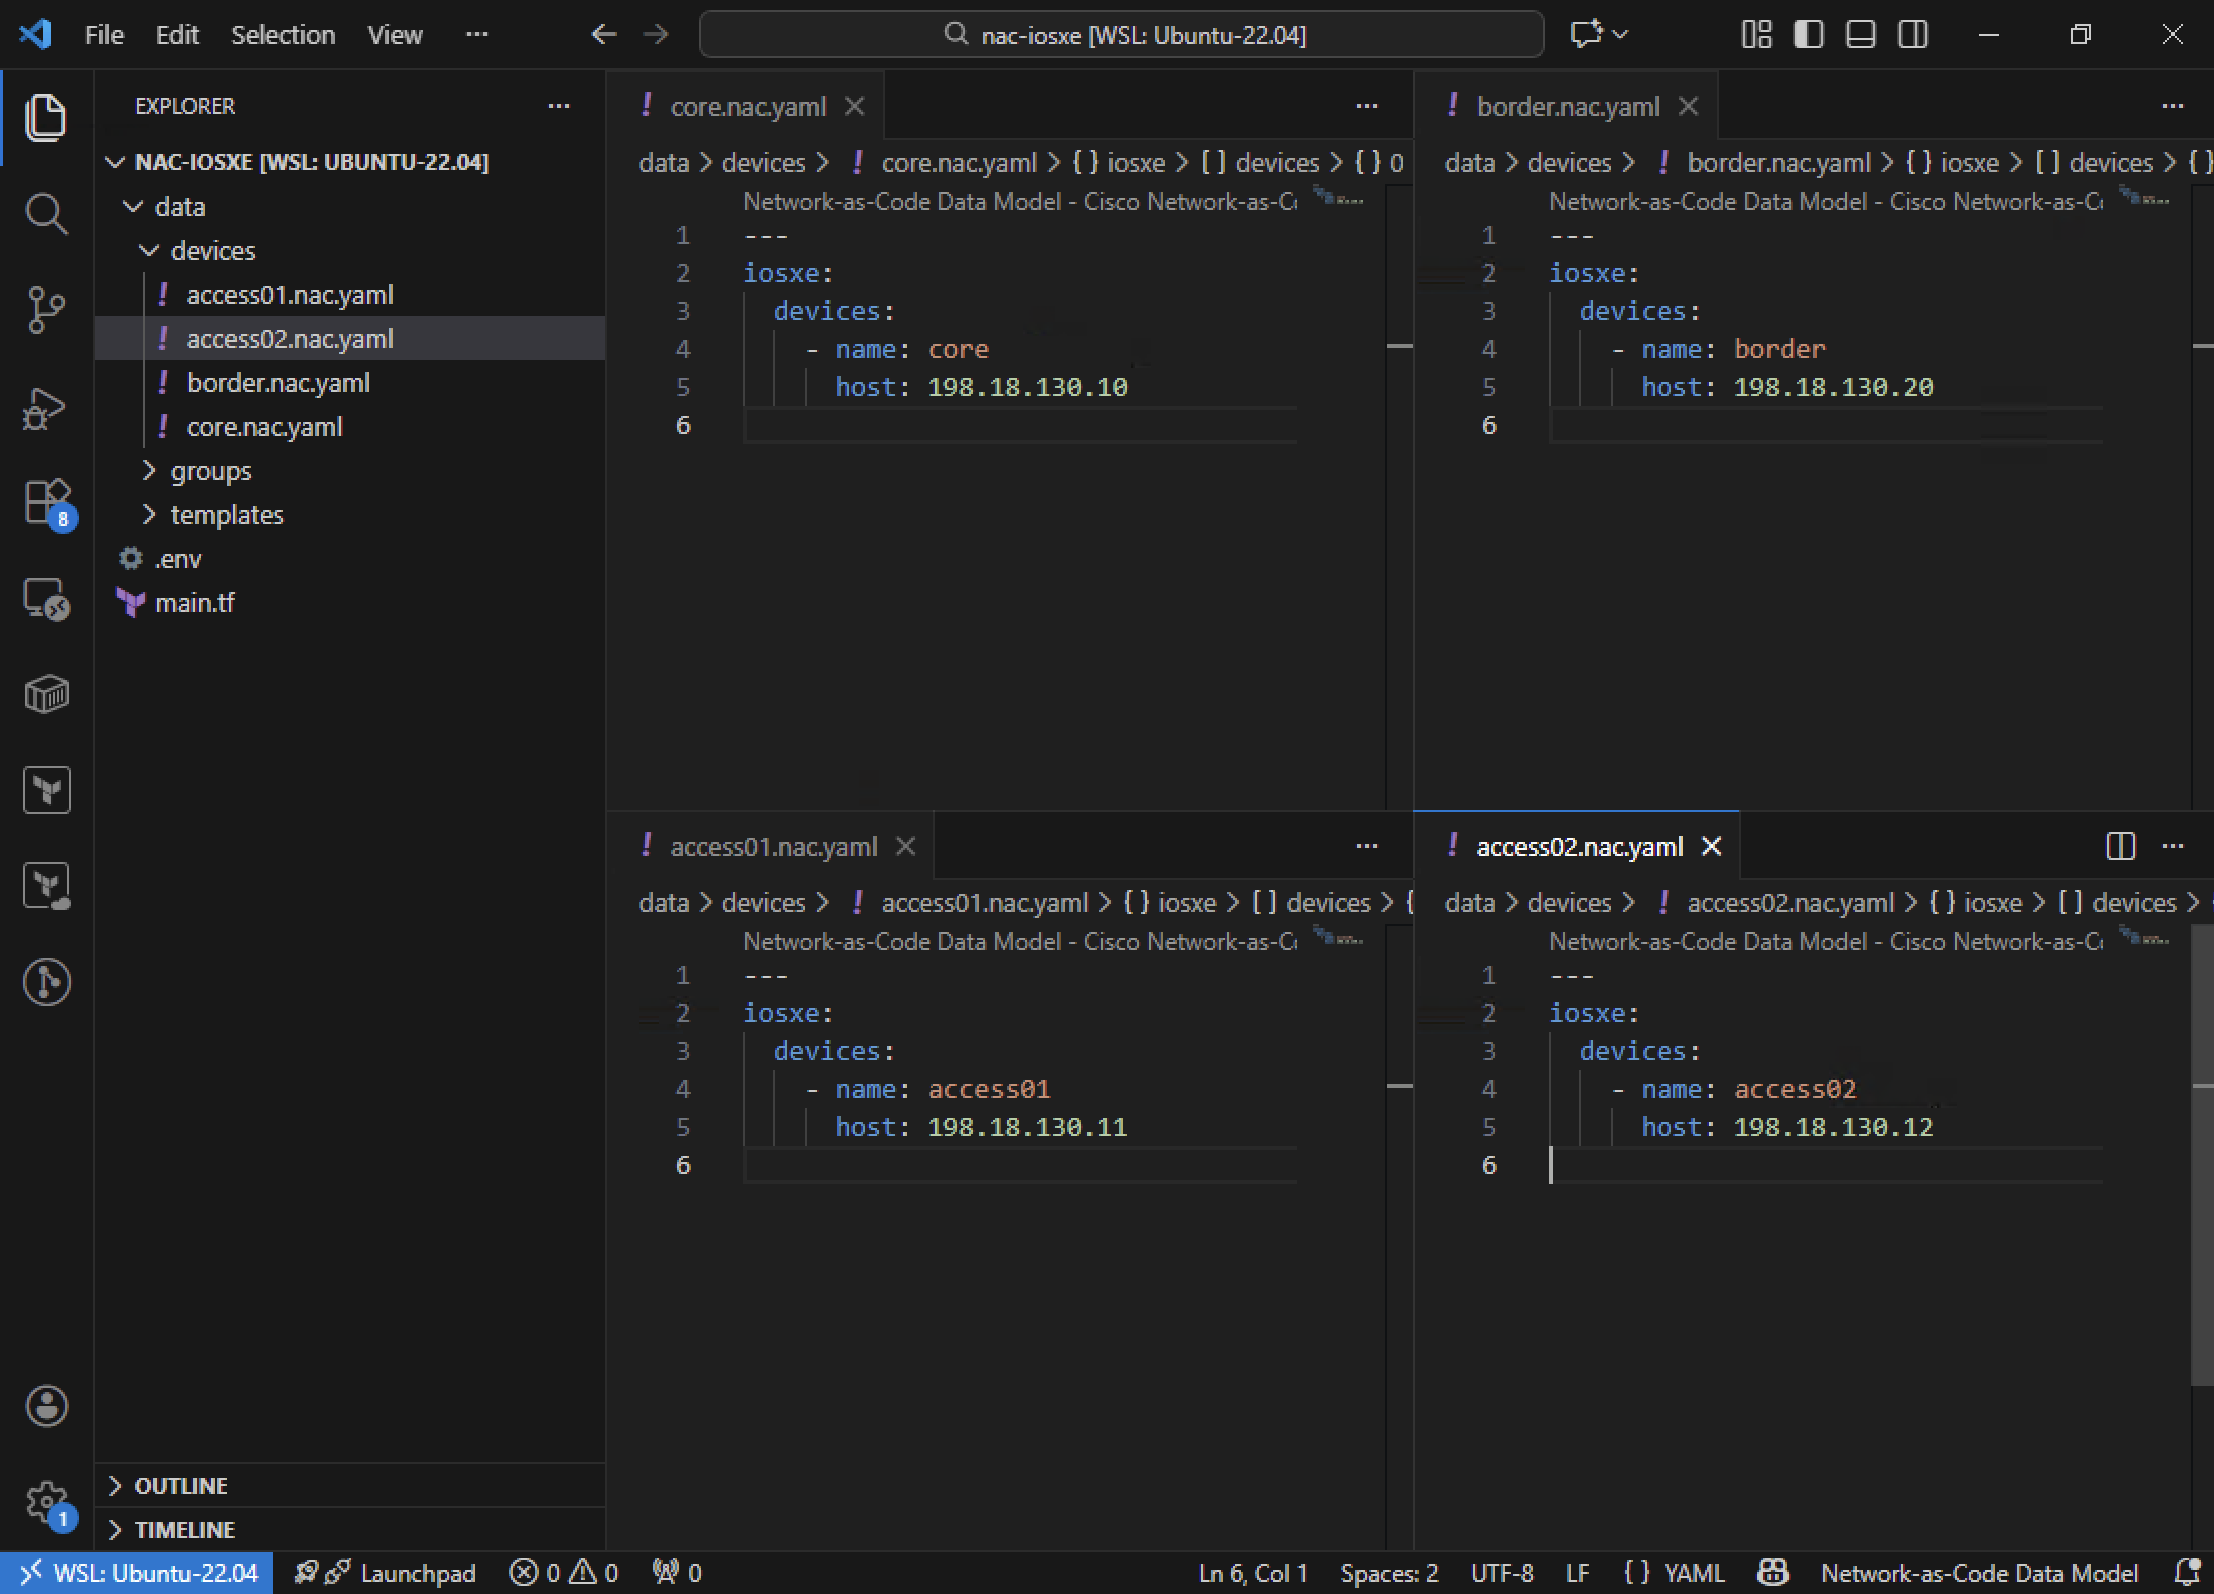
Auto-save is enabled
VS Code has auto-save enabled, so your files are saved a few seconds after you stop typing. At this point your project contains:
.env- device credentials and protocolmain.tf- Terraform module configurationdata/devices/*.nac.yaml- four per-device skeleton files
How the project will grow
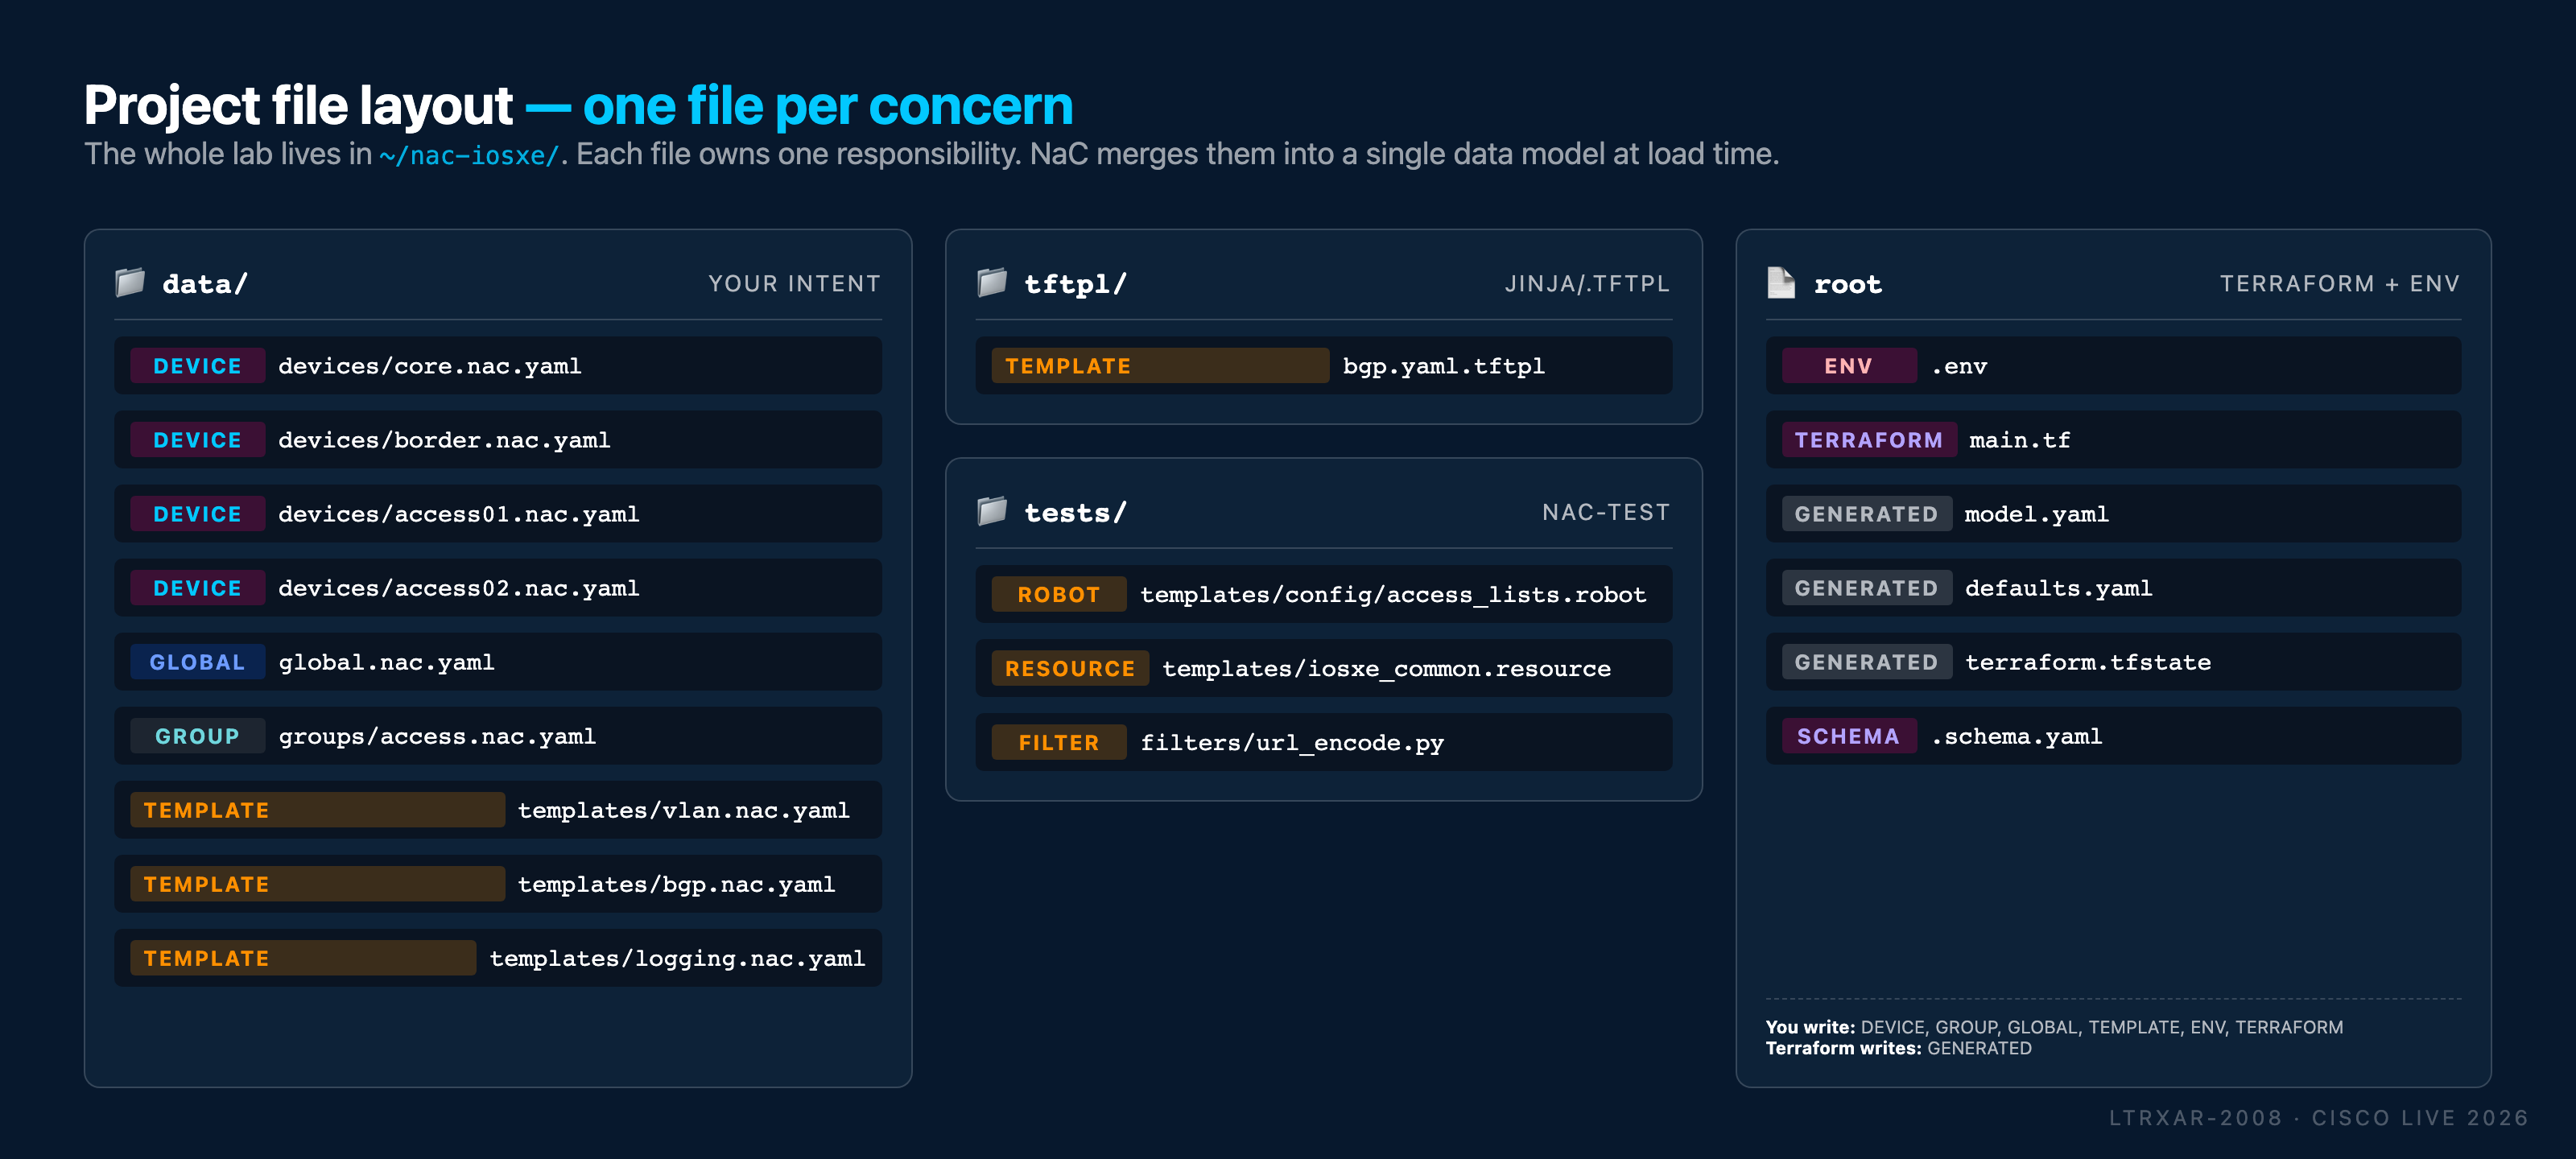
Every subsequent task in this lab will either extend the per-device files or introduce a new file type under data/, tftpl/, or tests/. Here's the final layout you'll end up with by the time you reach Task 11 - refer back to this any time you lose track of which file owns what:
What you've accomplished
- ✅ Set up the project directory
/home/cisco/nac-iosxewith adata/subfolder - ✅ Created
.envwith your IOS XE credentials and the NETCONF protocol setting - ✅ Created
main.tfpointing to the Network as Code module - ✅ Registered all four lab devices in their own per-device YAML files
Tools introduced:
- VS Code (with the Red Hat YAML extension) - YAML-aware editing, validation, linting
- WSL Ubuntu - the Linux environment where you'll run Terraform and other CLI tools
In the next task, you'll deploy your first piece of configuration - a login banner - to all four devices using Terraform.
← Previous: Task 01 - SSH to the lab devices · Next: Task 03 - Global Configuration